CIL Paint Meet-The-Experts Event + Win 2 Cans of CIL Paint!

CIL Paint Meet-The-Experts Event + Win 2 Cans of CIL Paint!


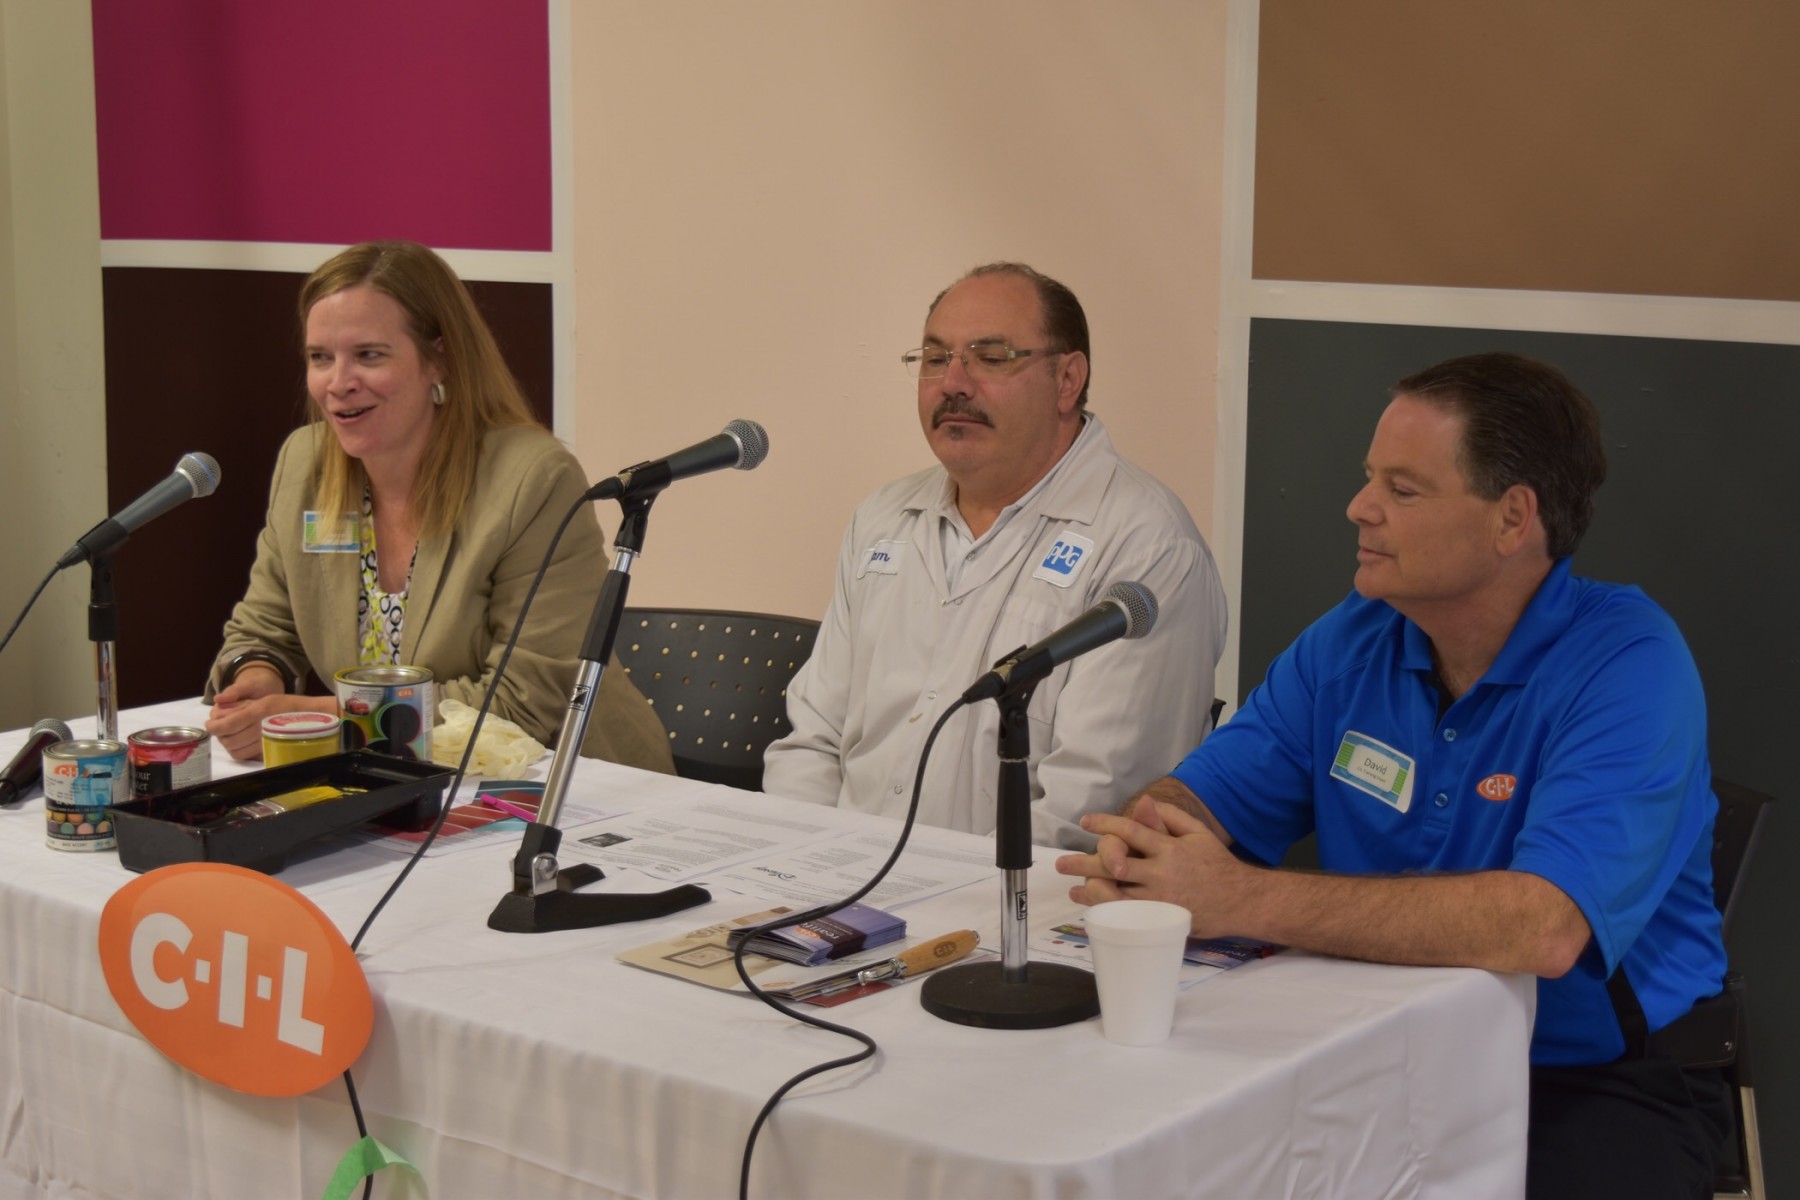
Last week I attended a great event at CIL Headquarters in Toronto where I learned about the hottest colour and paint trends for 2016.

A panel of CIL paint experts lead the way for a group of fabulous lifestyle and home décor bloggers (not only in person, but across the country via Webinar!), and we were able to ask questions and learn all about what’s new for paint in 2016.


CIL Paint Meet-The-Experts Event + Win 2 Cans of CIL Paint!


CIL Paint Meet-The-Experts Event + Win 2 Cans of CIL Paint!


We discussed the CIL paint online Ask An Expert service Where you can ask CIL paint experts a question and have it answered within 2 business days.

Décor and color specialists, product and technical experts, and even experienced painters are all available to answer your questions online!

How quick they get back to you really impresses me! You can ask your questions anytime, 24/7, and an expert will get back to you with advice. It’s a really cool service.

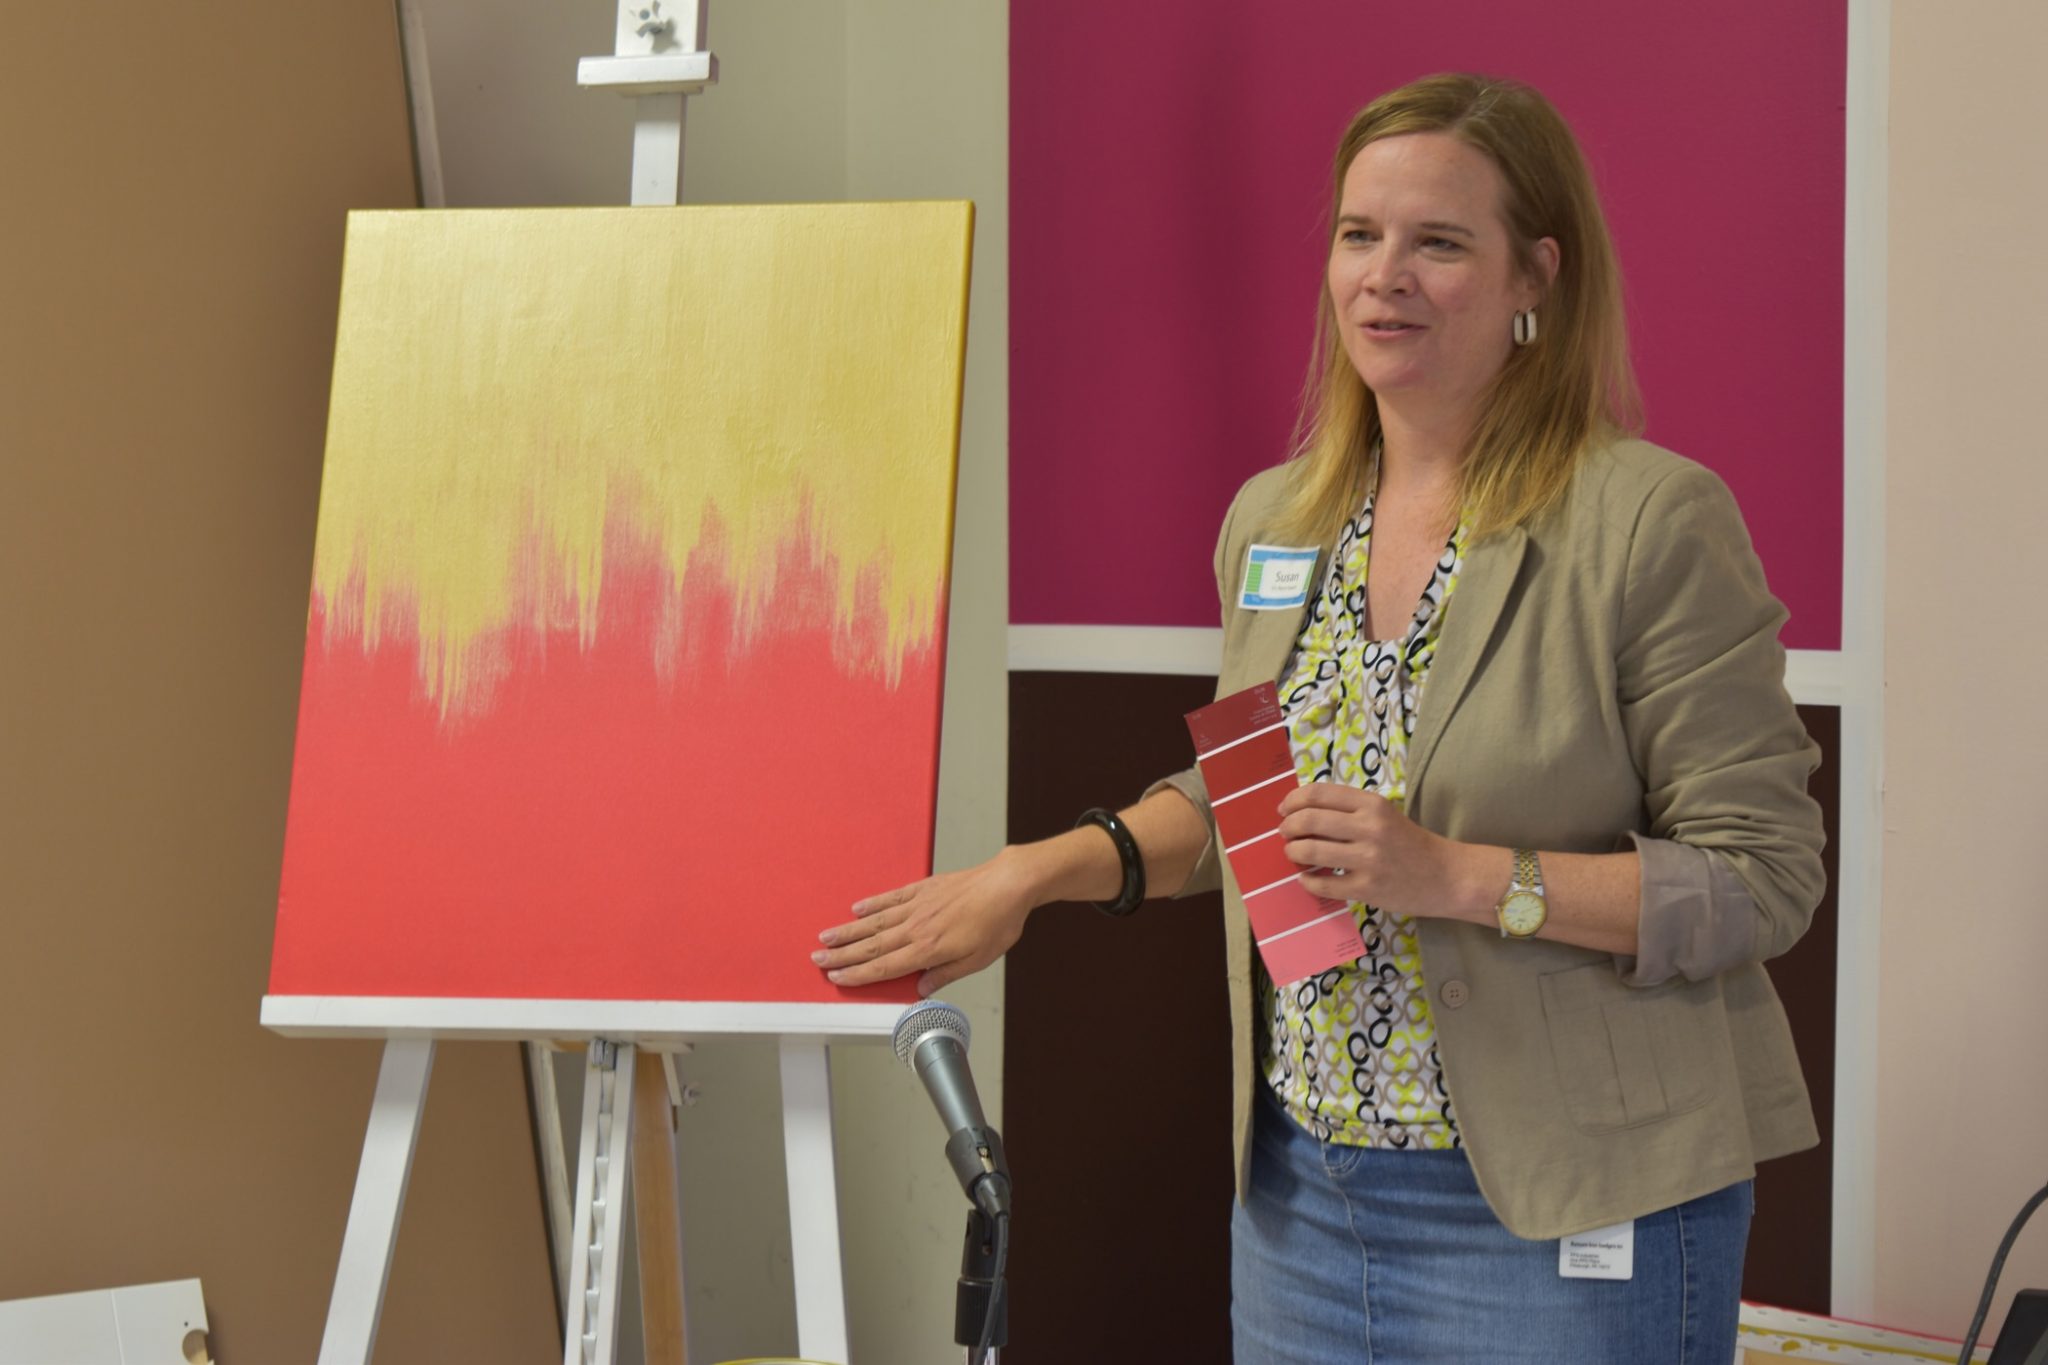
So what is the CIL paint Colour of the Year for 2016?

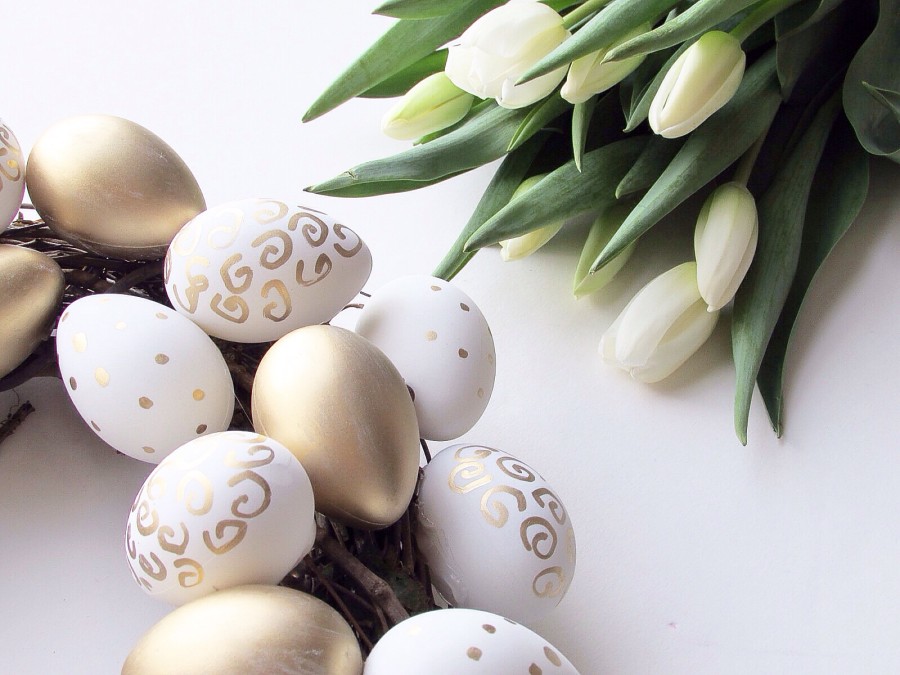
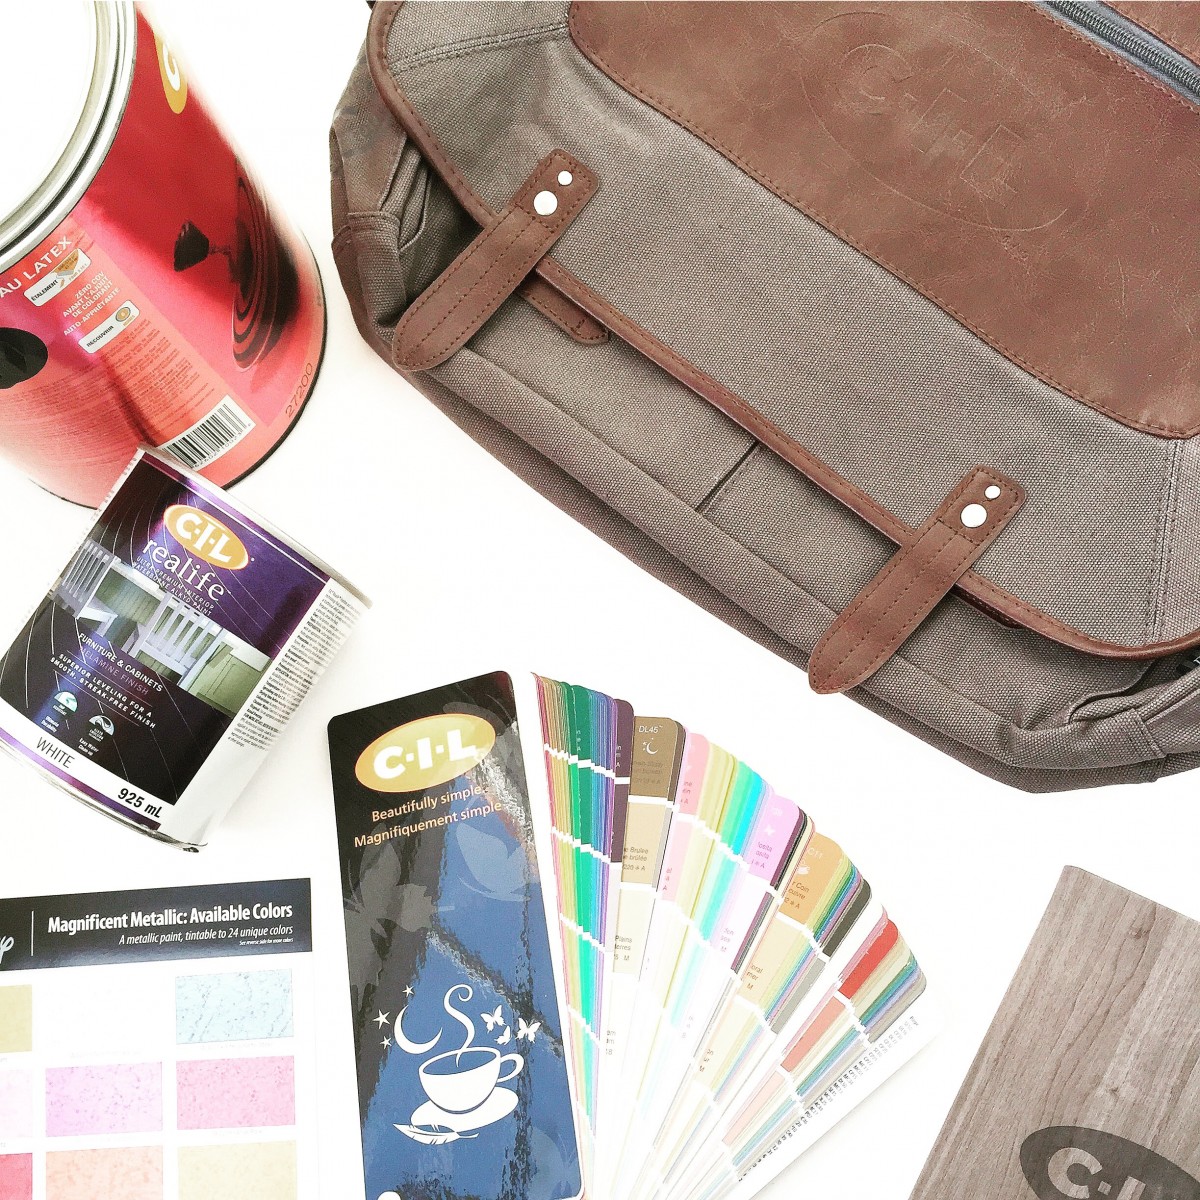
Soft blush pinks are expected to be on trend for 2015, such as Chemise Pink (60YR 75/075 MC10), CIL’s offical paint Colour of the Year. You will find soft blush pinks will be super hot in the year ahead, incorporated in all elements of home décor, from walls to furnishings to accessories. It’s all about tranquility in 2016.

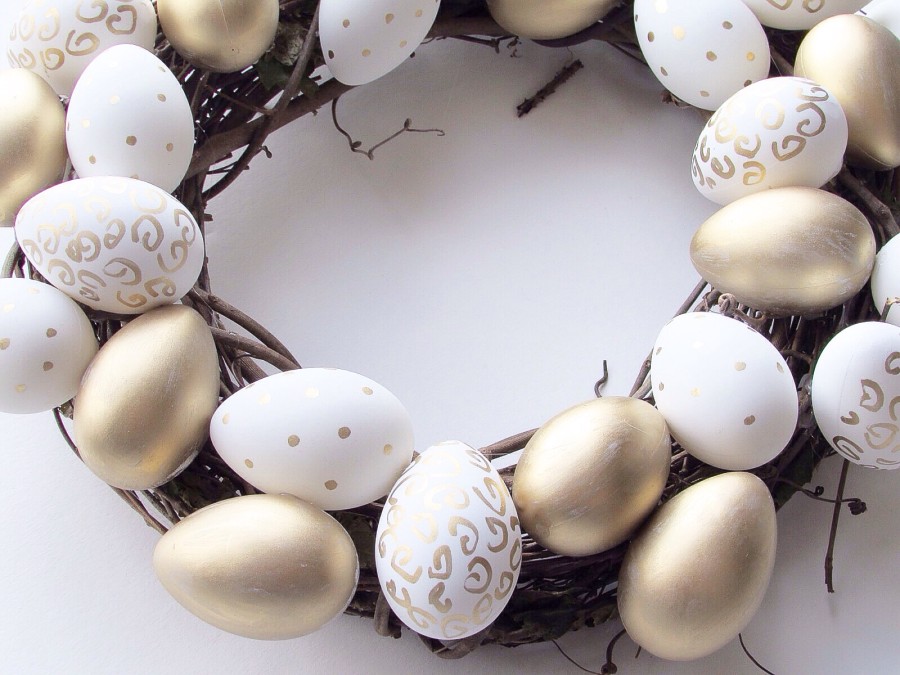
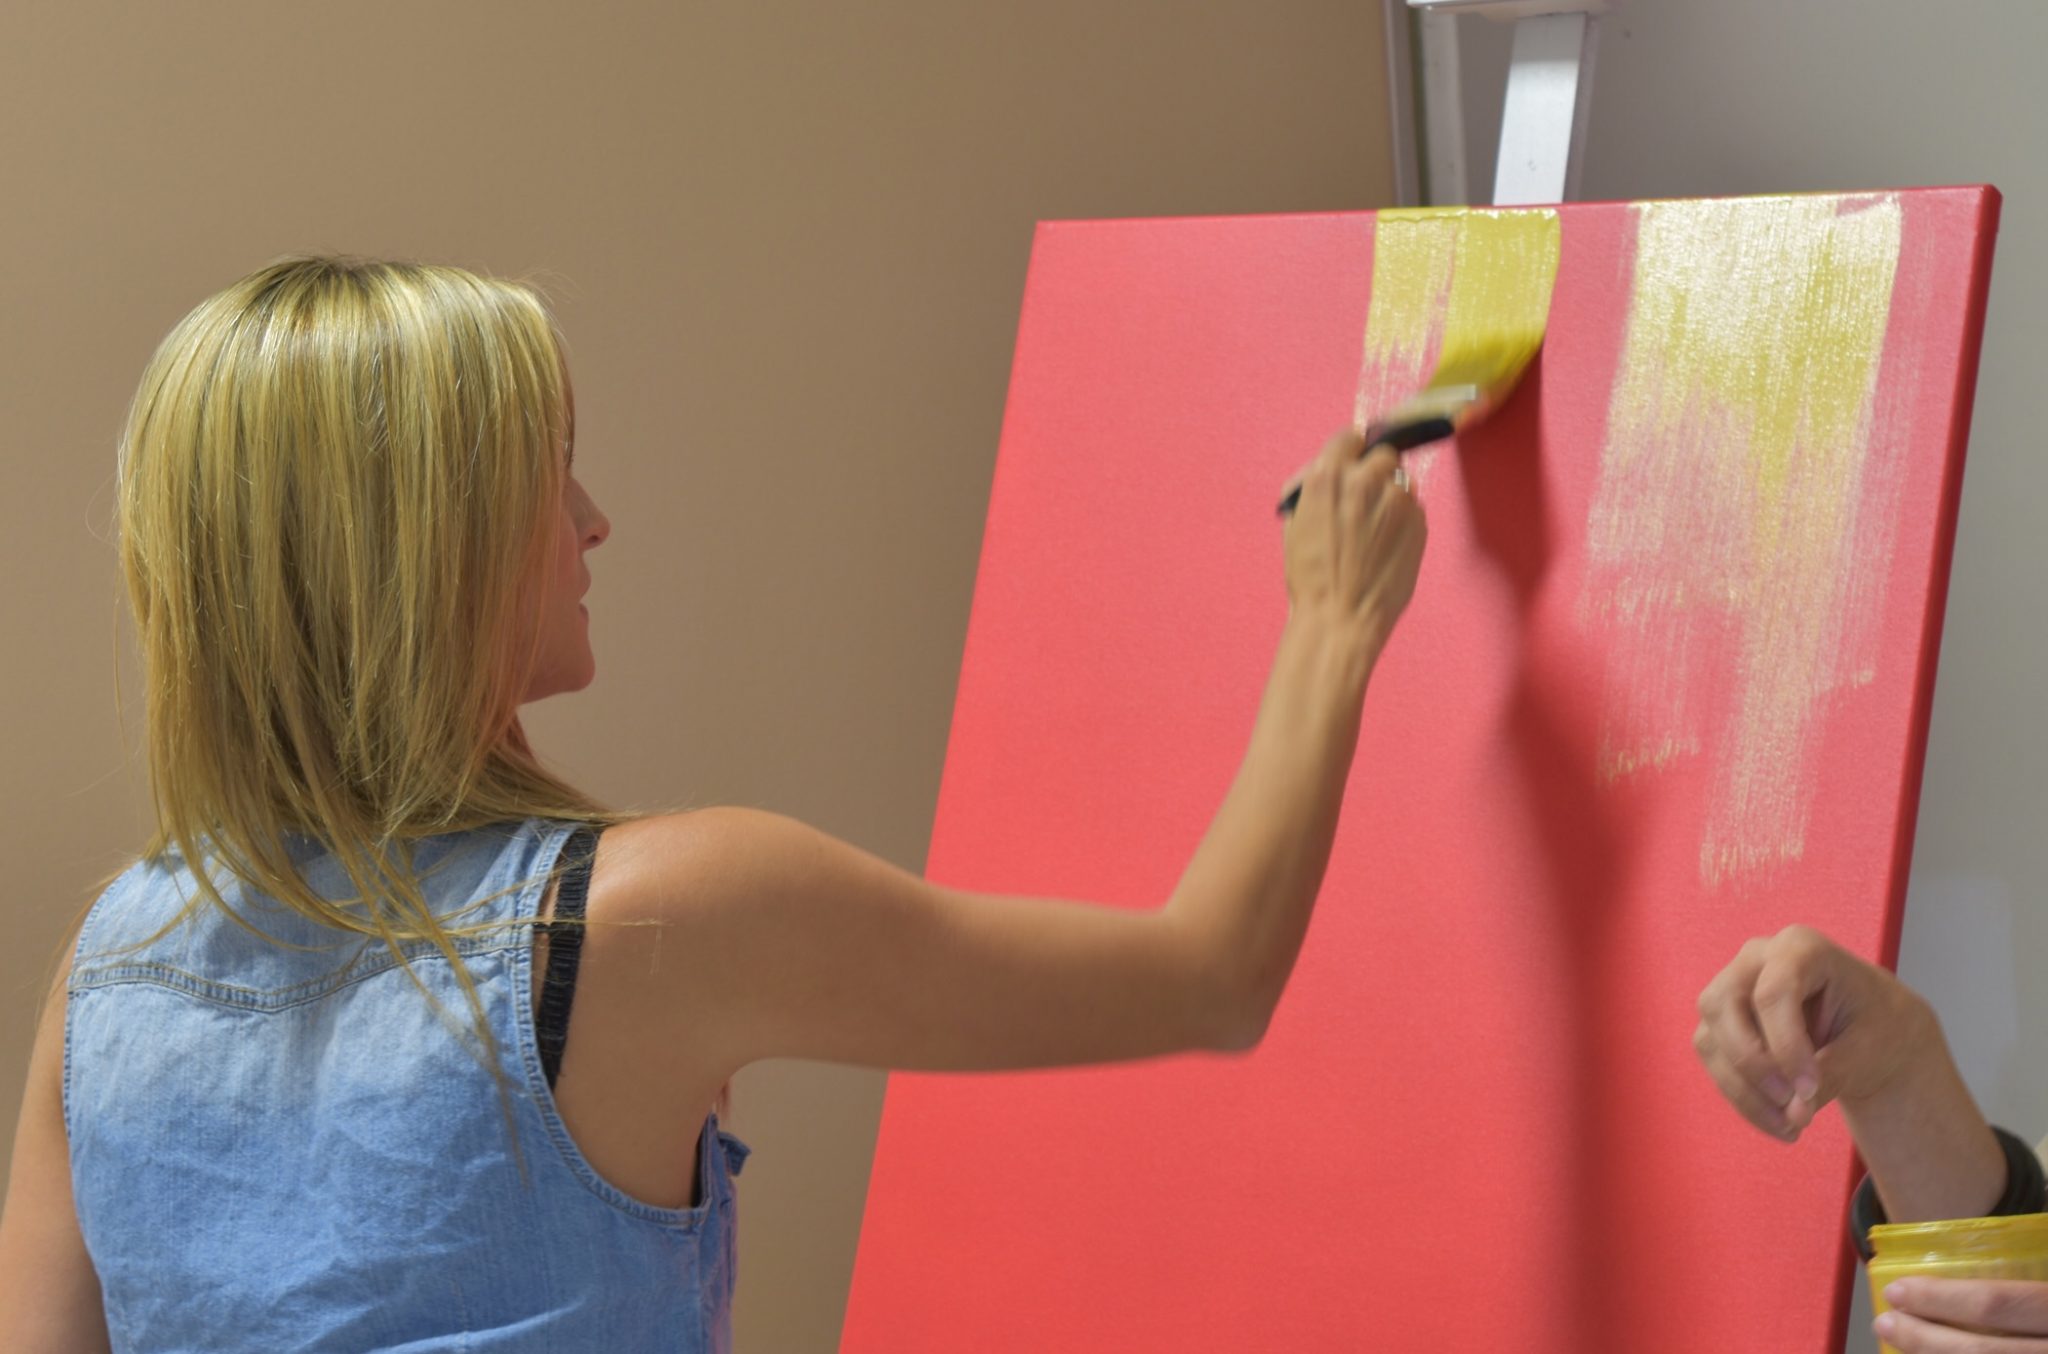
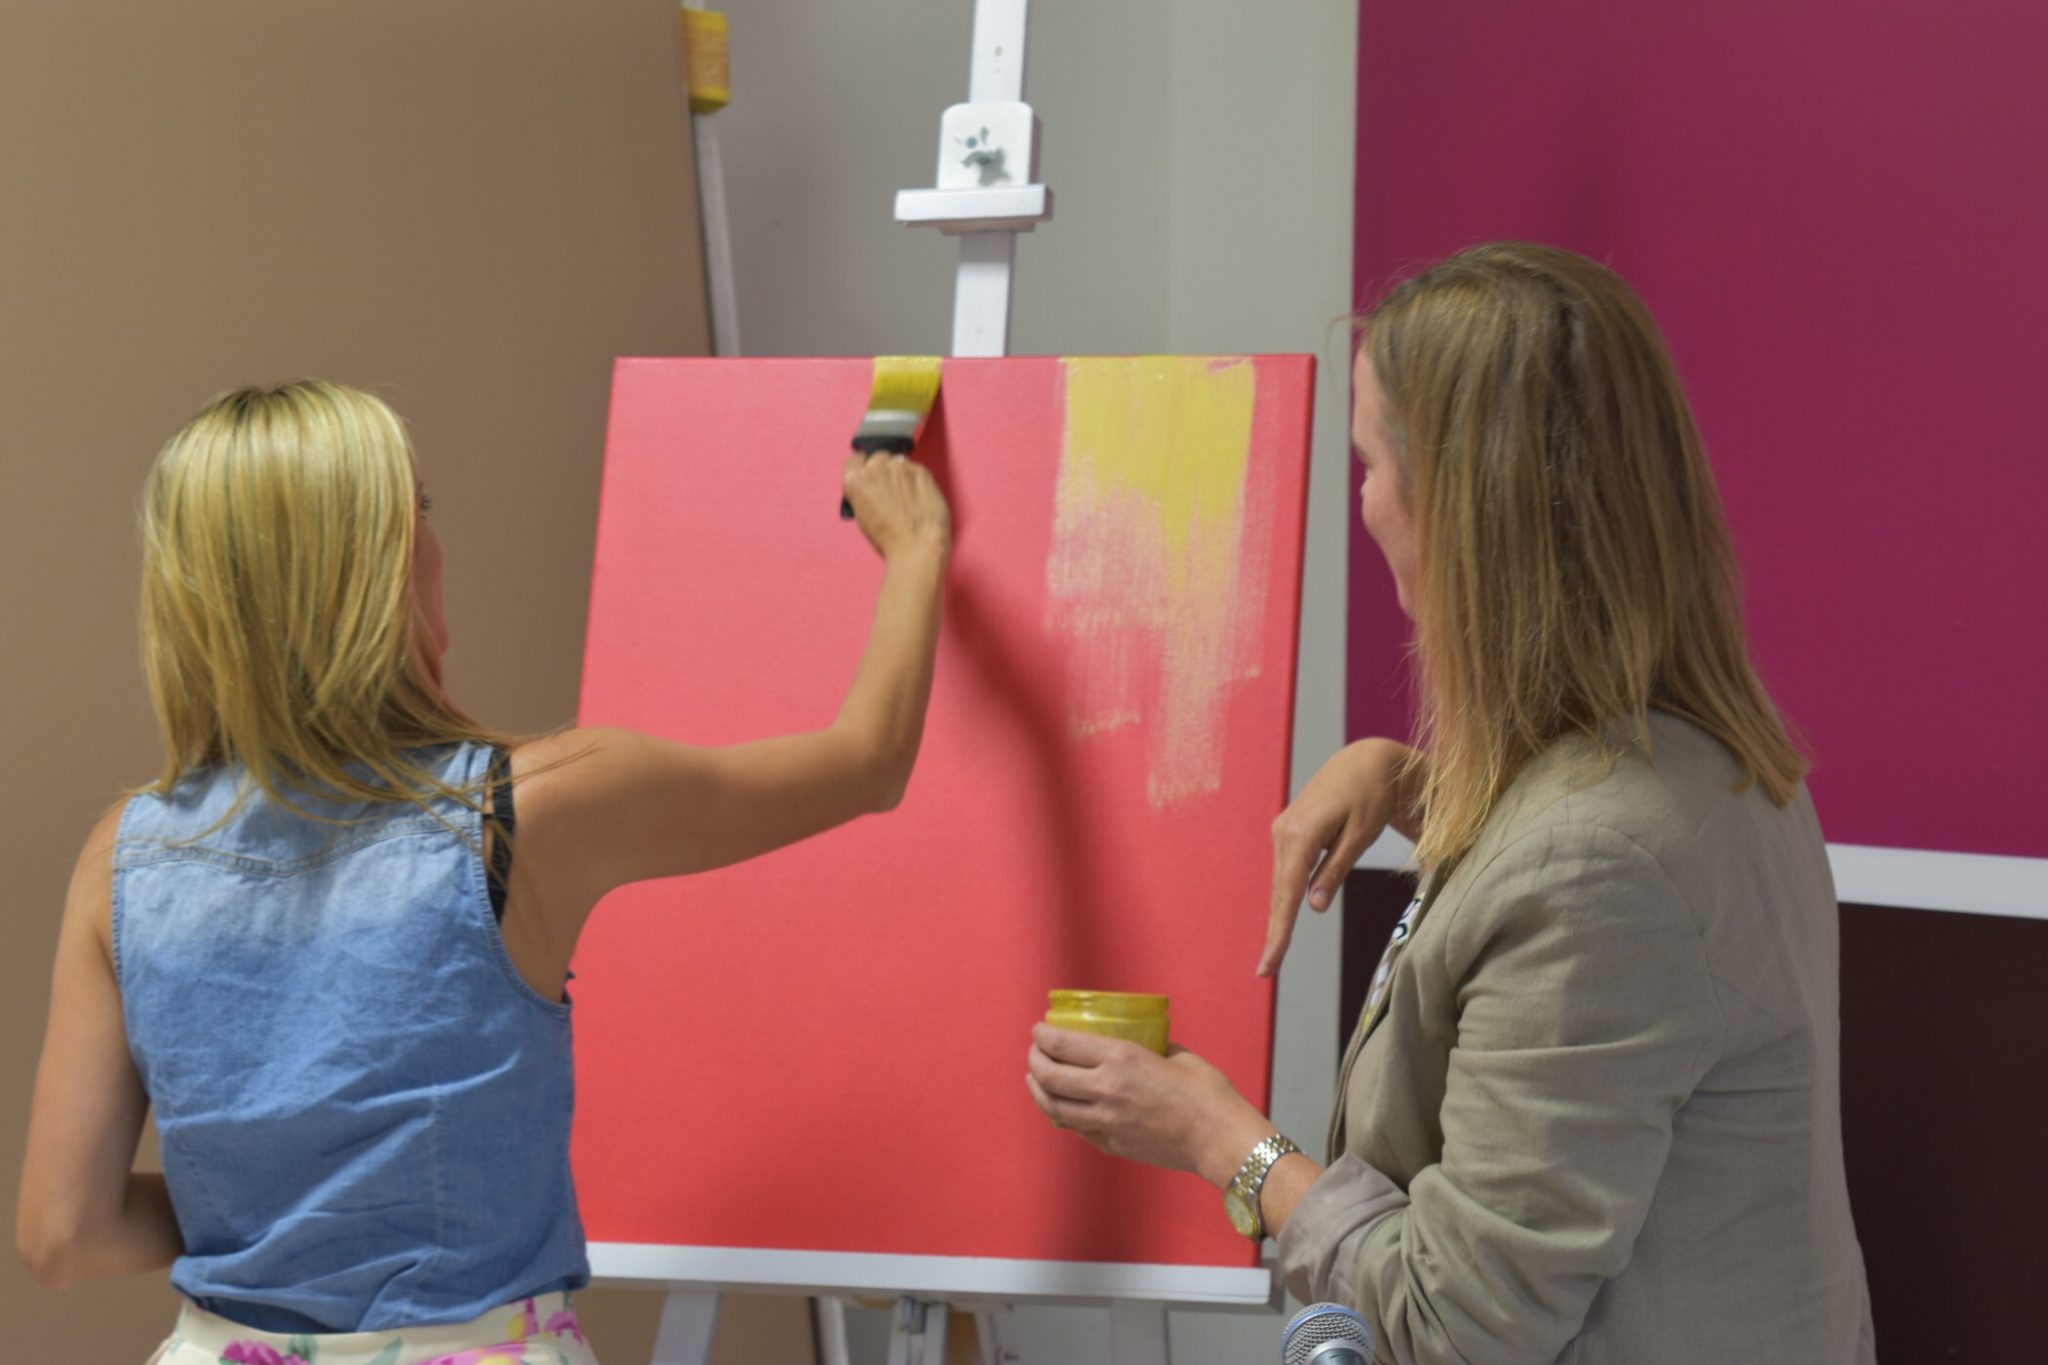
As for paint techniques, three kinds will stand out in 2016 including gold accenting, neo-traditional look and tone-on-tone. decor.

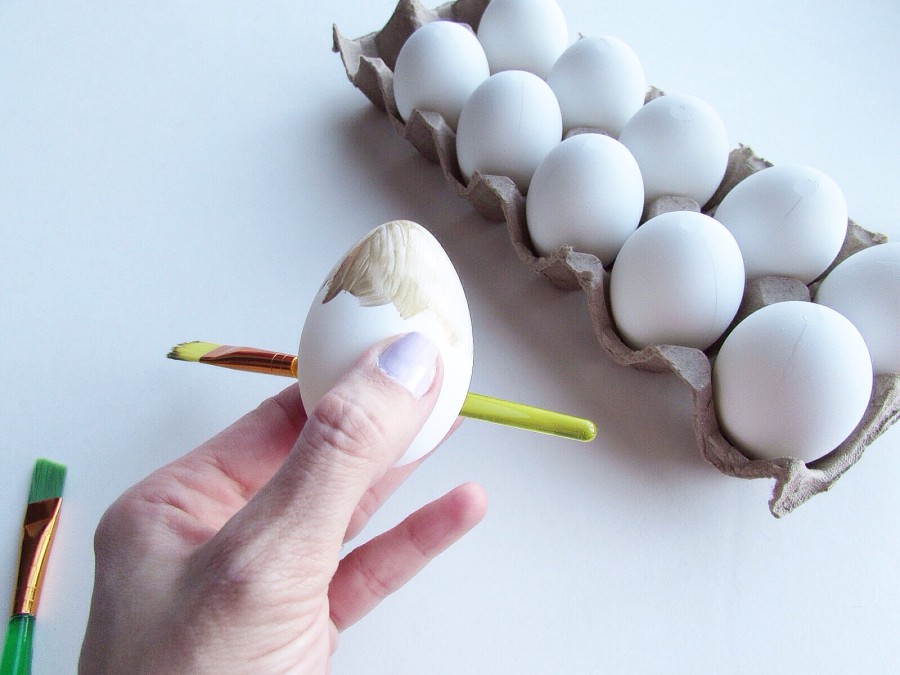
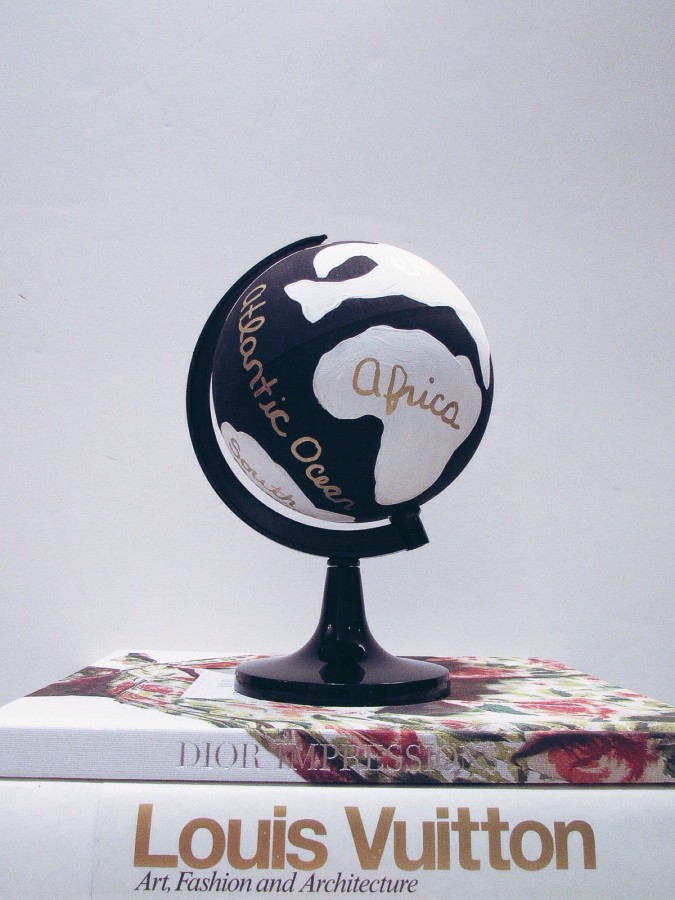
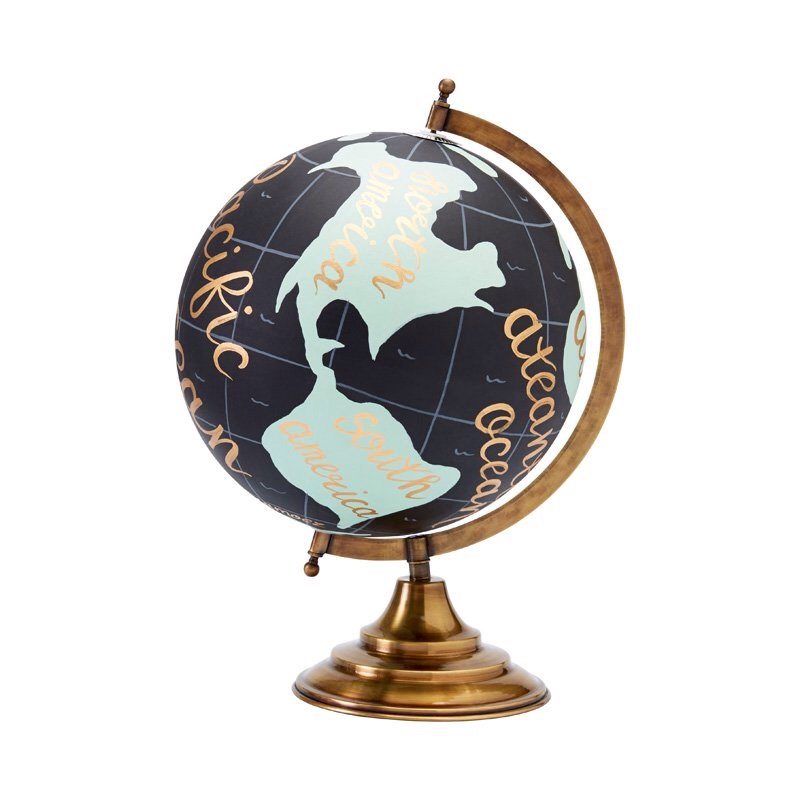
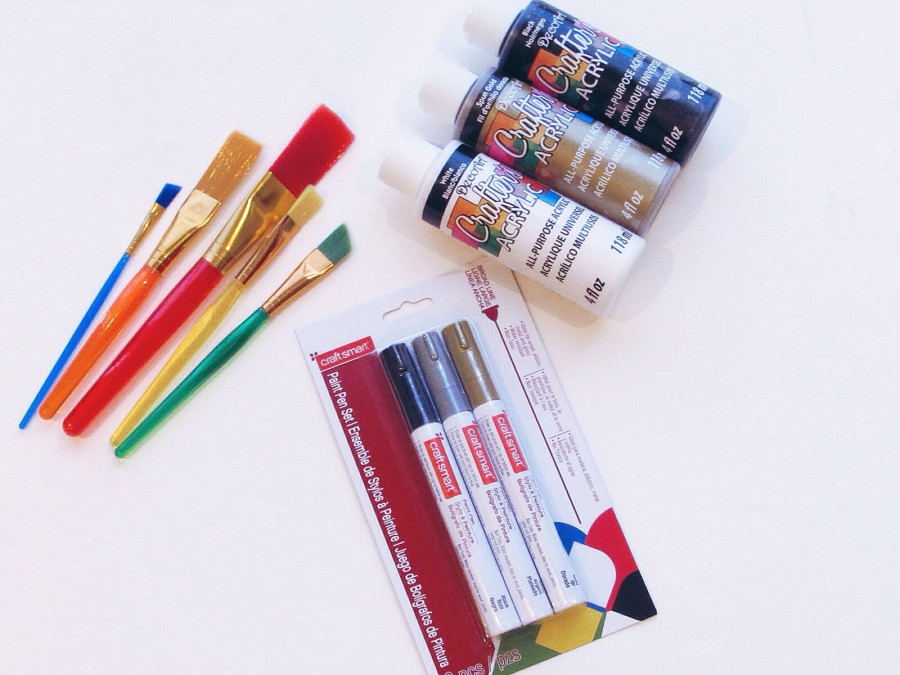
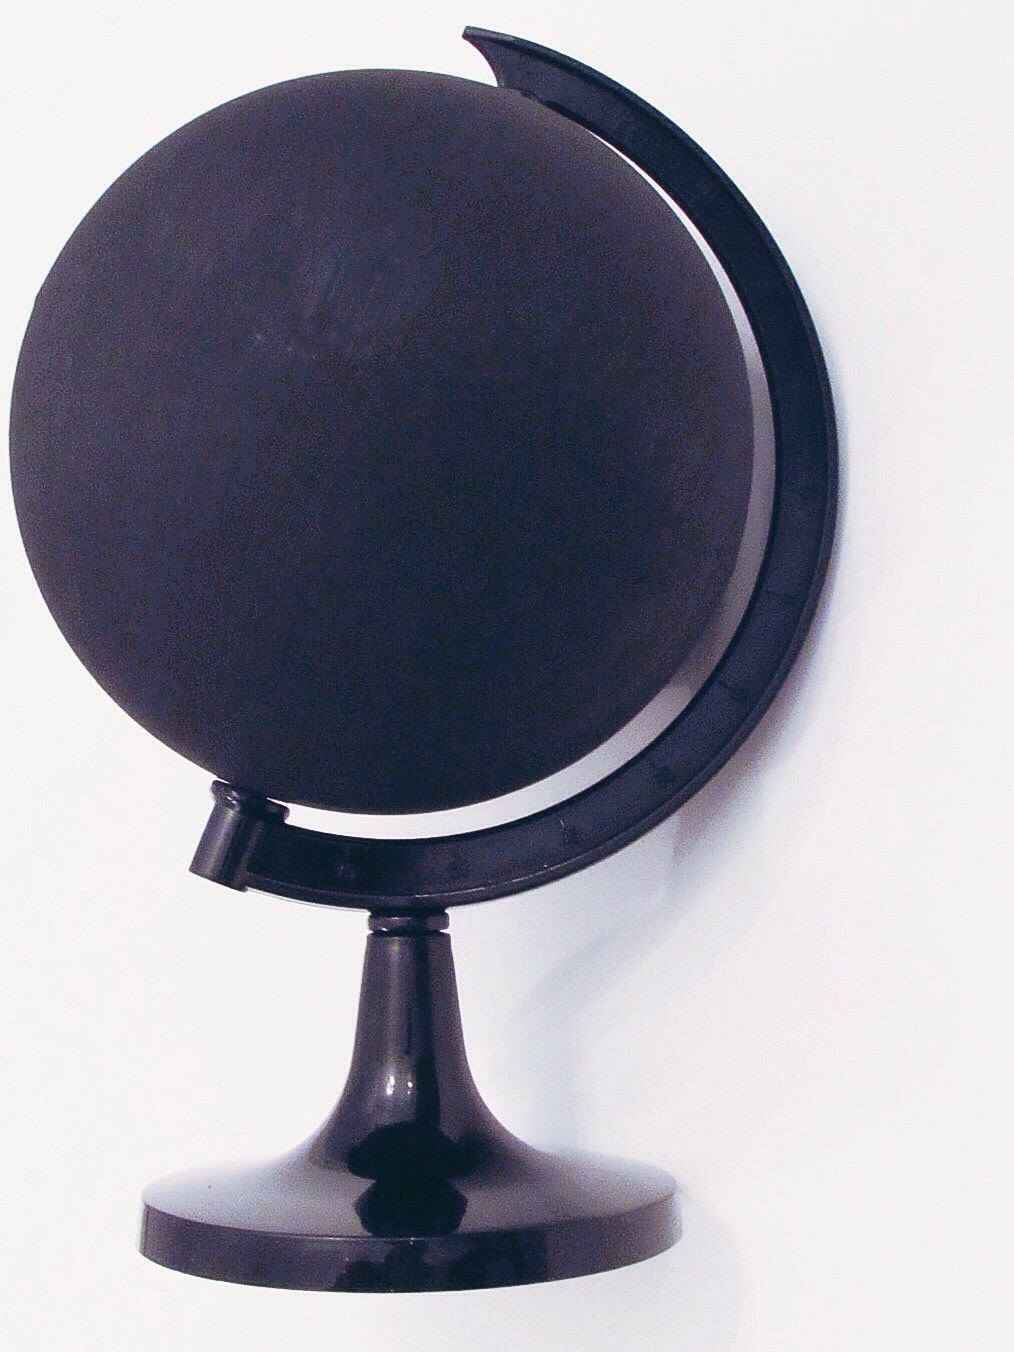
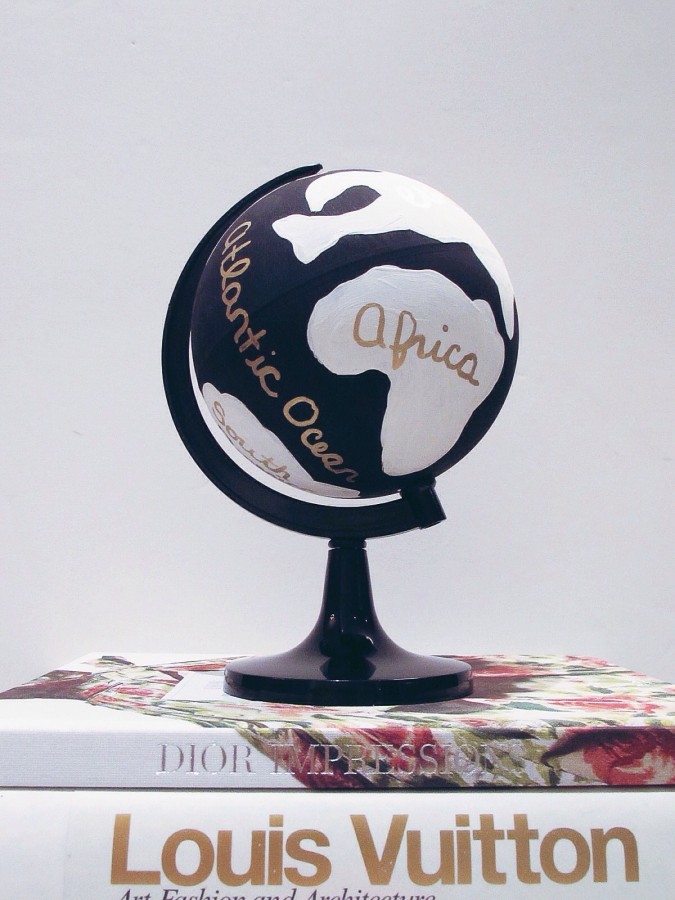
I love the gold accenting trend! Since I picked up a gold paint pen for my DIY globe project, I have found myself wanting to accent everything in gold!

You will likely see more doors and mouldings painted in more colourful hues instead of the standard white we are used to seeing. Even banisters which often have white spindles with a brown or black railing may start to see bolder and brighter colours to add fun to your space.

A tone-on-tone scheme uses colours of different intensity throughout a room, a look that can be dramatically altered by lightening or darkening the base colour. You will see this trend in all aspects of home décor in 2016

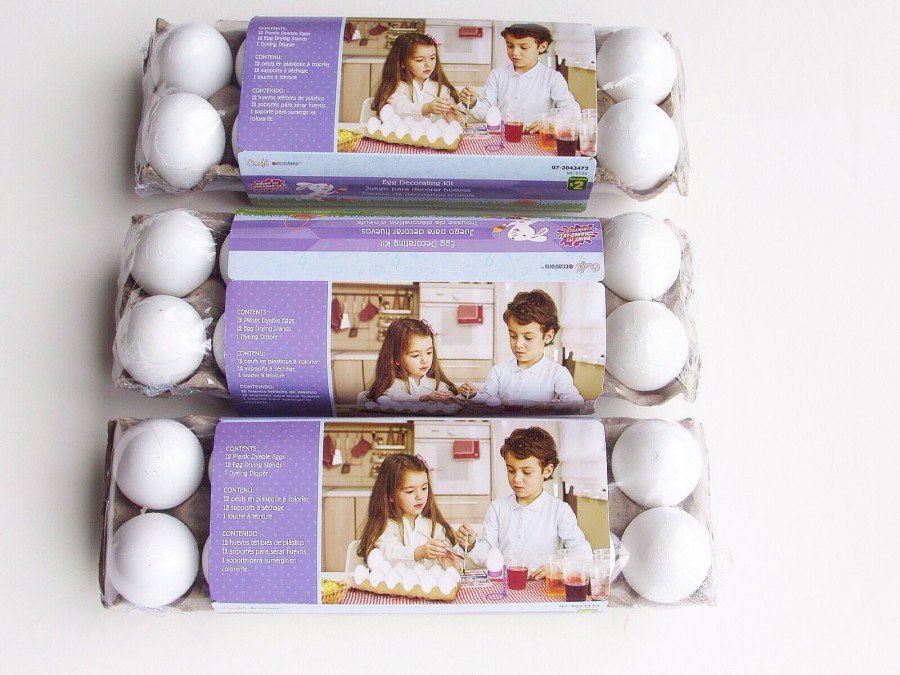
We learned about some very cool paint products that will be popular in 2016 including cabinet and furniture paint, and metallic gold paint.

It seems like most people are taking on DIY projects and painting vintage pieces to create a modern look. We have done a few of these projects ourselves and have loved the results. CIL Realife Furniture and Cabinets seem to do a great job at refreshing an older piece of furniture, or just to add a pop of colour to a piece that just isn’t the right color.

For a cabinet painting demonstration, visit http://www.cil.ca/Advice/June-2015/Painting-Kitchen-Cupboards. The paint CIL carries for painting cabinet’s is pretty amazing! It’s a fool-proof formula where your strokes don’t need to be perfect, but it dry’s like they were!

Shimmery metallic paint – such as CIL paint’s Disney Magnificent Metallic Specialty Finish , tintable in 24 colours including gold-tones, is ideal for adding a touch of trendy gold to traditional elements in the home.

I gave this technique a try at the Meet-The-Experts event, and it actually wasn’t hard at all! It’s so fun to create your own canvas art, and to accent it in gold all I had to do was drag the brush from top to mid way to create an fading feathered effect.


CIL Paint Meet-The-Experts Event + Win 2 Cans of CIL Paint!


CIL Paint Meet-The-Experts Event + Win 2 Cans of CIL Paint!


CIL Paint Meet-The-Experts Event + Win 2 Cans of CIL Paint!


Here is a video of one of the experts showing us how it’s done!


https://www.youtube.com/watch?v=WgFMZgl8x9k


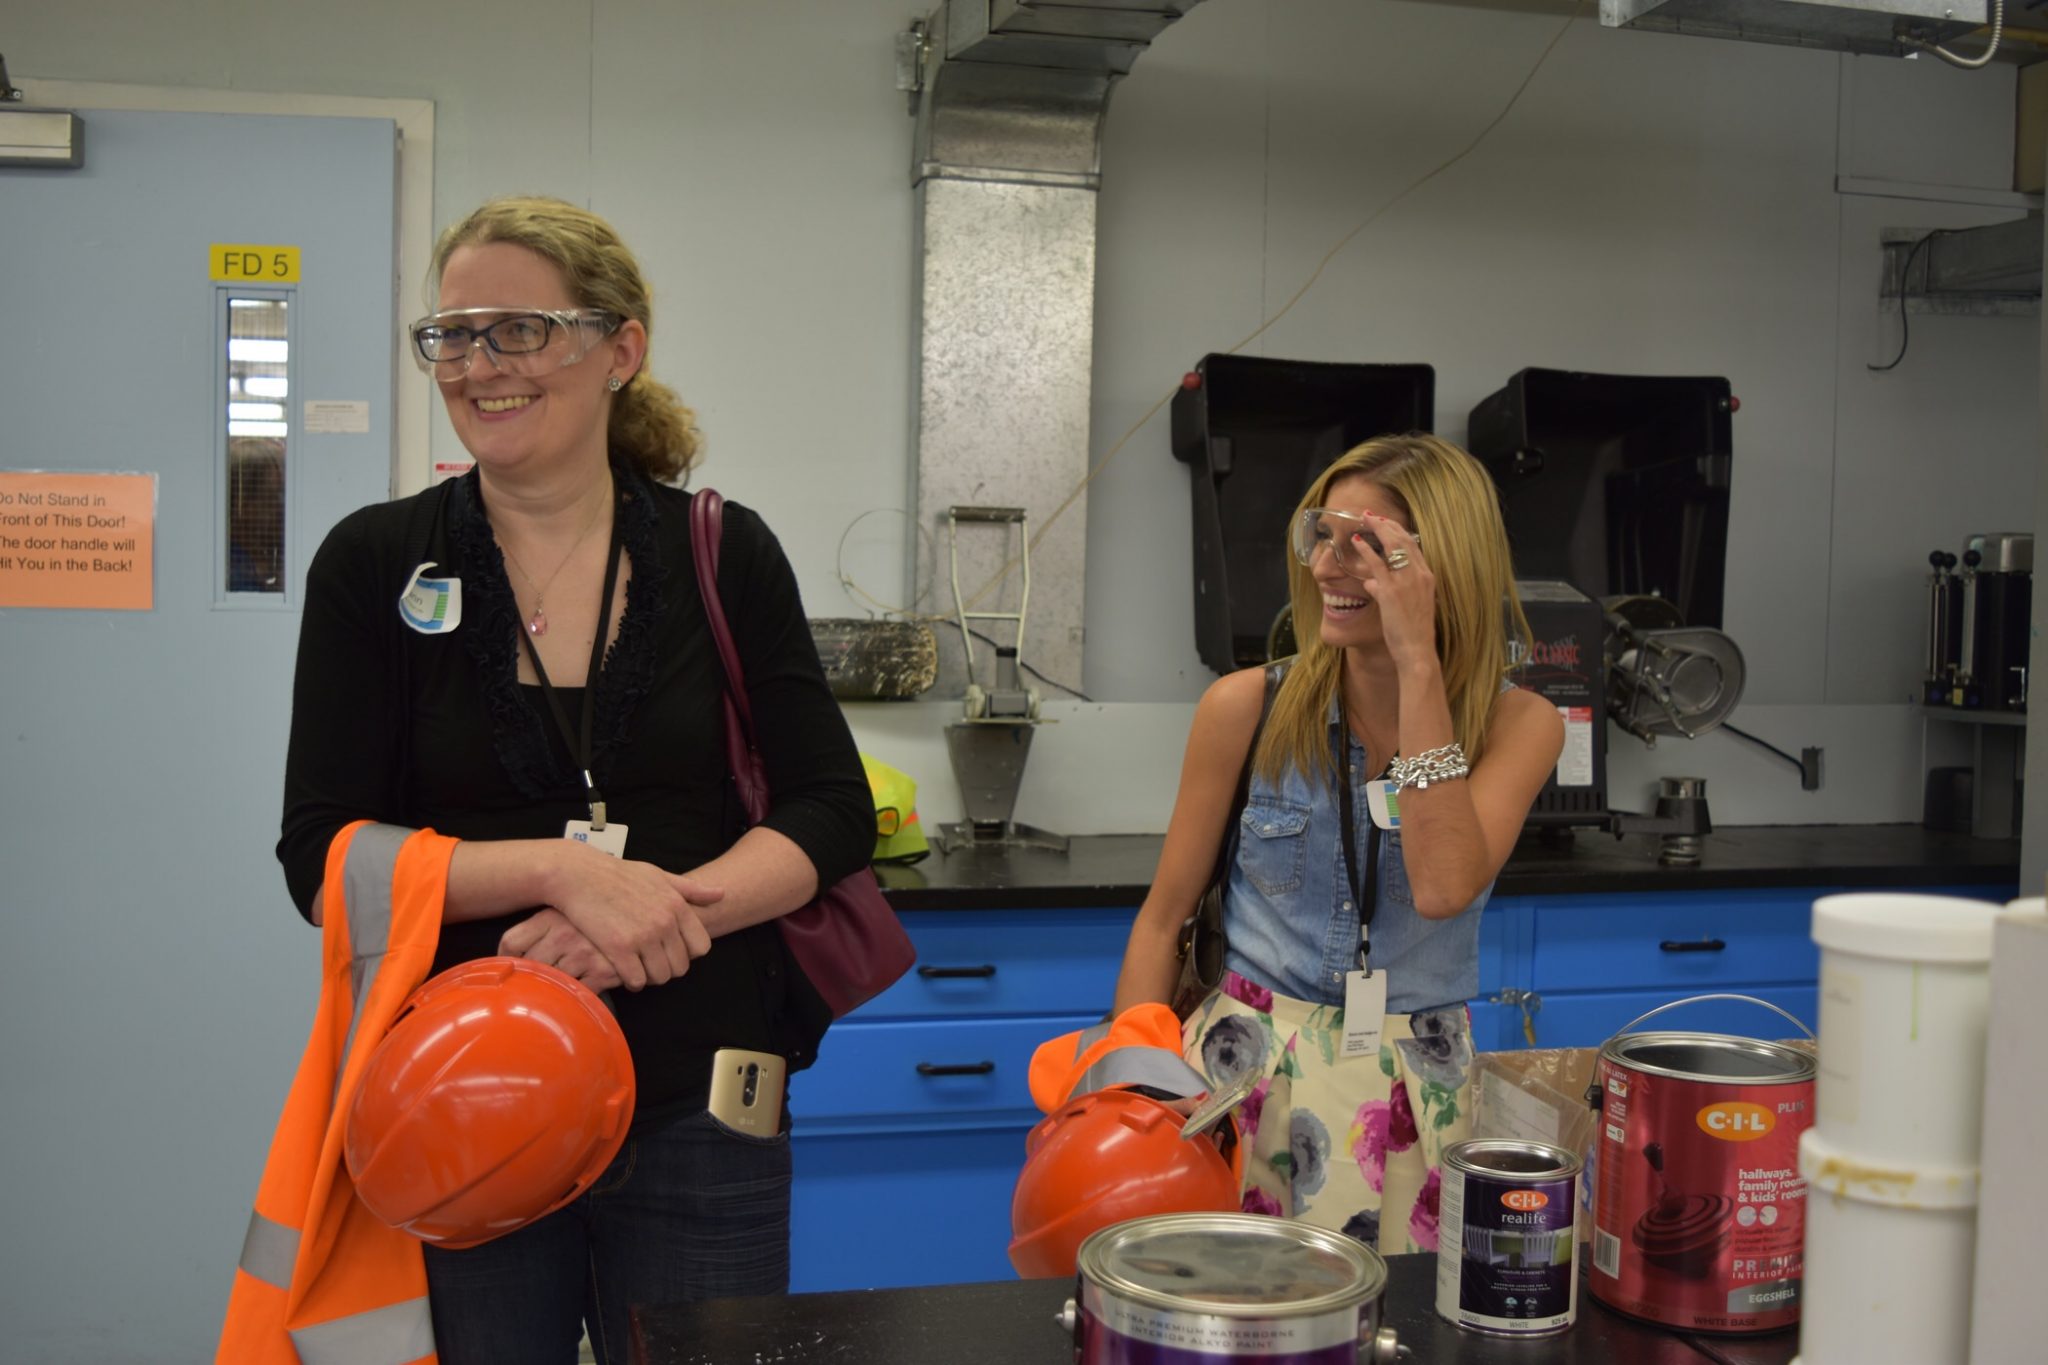
I learned a lot at this event! We did an excellent tour of the CIL facilities that night as well, and I learned about all kind of things related to paint that I had no idea about! We couldn’t take photos in the production area, but I can tell you making paint is sort of like baking a cake! There are lots of ingredients (including some that really look like flour) which are mixed together, and voila! It was really neat to see.


CIL Meet the experts paint event


One major thing I learned about is how important a primer is. I get a little lazy when it comes to painting, but I learned it’s important to not skip primer. Primer is cheaper than paint, so it’s better to prime and then paint so you need less coats of paint. The last thing you want to do is buy more paint because you need more coats!

CIL paint products are available at The Home Depot, Walmart, Canadian Tire, Rona and other independent paint dealers nationally. The price for a gallon of interior CIL paint ranges from $28 to $55, depending on the product. More information and paint discount coupons can be found at www.cil.ca.

Now for the contest!

One lucky sparkleshinylove reader will win 2 cans (an $80 value) of CIL paint to do their own project at home!

Enter via the Rafflecopter App below to win. The contest begins Friday, August 28th 2015 at midnight, and ends Monday, September 7th, 2015 at midnight. The winner will be announced on the blog following the contest closing. This contest is open to Canadian (excluding Quebec) residents only; prizes are limited to one prize per winner – i.e. while a person may enter multiple CIL paint online contests, he or she may collect a prize from only one of the contests entered.

Good luck to everyone who enters!


a Rafflecopter giveaway


Mandy Furnis


Styling the Graham & Brown Pocket Watch Clock

image


This month Graham & Brown challenged me to do some styling with this year’s precious trend in mind.

“Precious is an appreciation for all things vintage and antique. Whether you are redecorating, buying a few wall art pieces, or simply making a statement of your attic treasures, make sure you have fun with this one. Create your very own museum of you, full of memories.” – The Precious Trend

My husband and I have been working on a wall project for the past year. We have been slowly adding things to our collection, mostly curated items from my husband’s families past.

The family owned a boat building business, and they built the boats we all still use today. We spend most of our summer’s at the boat, enjoying the sunshine and having picnics at the beach.

We spent lots of time pouring over photos, some decades old of different boats they made on the water.

Each photo had to be digitally re-mastered and reprinted because of wear and tear, but slowly our collection grew to showcase some great vintage shots of some of these boats.


Graham & Brown Pocket Watch Clock


It’s an ongoing project – there are a few more specific boats we would like to add, but we are slowly getting there. We added a few touches of our own like paddles my husband sanded and painted himself and a depth chart he created from wood found at the dock as well.


Graham & Brown Pocket Watch Clock


As something to add from our own family (and keeping to the nautical theme), we added a photo of a crab we saw on the beach when were in Turks and Caicos last year.

We wanted to add more to the room, and one thing that we thought would fit in perfectly was the Pocket Watch Clock. It says London on it which is perfect because that is the name of our son!

It has a great vintage look, and we thought it worked perfectly with the room.


Graham & Brown Pocket Watch Clock


Graham & Brown Pocket Watch Clock


image


I love that we have a wall in our home with so many items that are unique to our family. Adding the vintage-style clock was the perfect addition to the room!

The clock has the perfect colouring to give that vintage feel, and it really worked well with our existing theme.

I realized later this is the only clock we have in our house, so it was much needed!

To see this item, and to shop more of what Graham & Brown has to offer, visit www.grahambrown.com!


Disclaimer: This product was provided to me for review, but all opinions are fabulously my own.


Mandy Furnis


Creating a Lego Themed Party Table

Perfect Lego themed party table sparkleshinylove


Anyone who has given their child a birthday party knows that when you ask them “what type of party do you want?”, it changes daily. Spider-Man, Jake and the Neverland Pirates, Big Hero 6…..every day I asked, the party theme seemed to change. Finally my son and I settled on a theme he luckily didn’t change his mind on – Lego!

My son loved The Lego Movie, and he’s been loving putting Lego sets together so the theme stuck long enough that I could have the party.

We had the party with family at our home, and I wanted to do a great cake table with the Lego theme.

To start, I wanted a fun tablecloth. Of course I couldn’t find what I wanted anywhere, I decided to go to Fabricland and have a tablecloth cut! It seemed a bit easier to look through a store full of fabrics to pick out my favourite pattern instead of finding a pre- made table cloth online.

Next up I decided to make my own backdrop for the table. I purchased three poster boards that I taped together for only a few dollars at Walmart, amd then I got to work on making paper fans. There are plenty of Etsy shops online selling paper fans, but I decided to make them myself for this project. They were super easy to make, and all I needed was some paper and a glue stick! I used scrapbook paper so they were a bit more sturdy. I also purchased a fancy hole punch from Michaels to give some of the fans a pattern.


Perfect Lego themed party table sparkleshinylove


Perfect Lego themed party table sparkleshinylove


I ordered the invitations, water bottle labels, and thank you notes from Lucky Little Prints on Etsy. They had a whole package which also included personalizing their Lego party themed items including cupcake toppers and a welcome sign!


image


Perfect Lego themed party table sparkleshinylove


Perfect Lego themed party table sparkleshinylove


A Lego cake was in order for the table, and I wanted it to have some height so it was actually two cakes stacked on top of each other. I also wanted cake pops as a treat as well, amd I made my own cake pop holder.


Perfect Lego themed party table sparkleshinylove


I used two pieces of styrofoam as the base, and to make each look like a piece of Lego I cut styrofoam balls in half, and glued them onto each styrofoam block. I pained each red to finish it off.


Perfect Lego themed party table sparkleshinylove


Perfect Lego themed party table sparkleshinylove


I used Lego stickers to theme the popcorn tubs and cady bags for the candy jars, and used some colourful paper straws to decorate the table.


Perfect Lego themed party table sparkleshinylove


Perfect Lego themed party table sparkleshinylove


As a thank you gift I had Lego cookies for each of our guests from Sweet Treats by Franca P.


Perfect Lego themed party table sparkleshinylove


Perfect Lego themed party table sparkleshinylove


How adorable are these cookies? And they tasted AMAZING! I was so happy with the way they looked, and they tasted so good we didn’t want to give them away. Sweet Treats by Franca P. will create custom treat orders for sugar cookies, Oreo pops, chocolate marshmallows, chocolate strawberries and even caramel corn! I loved the way they packaged these cookies as well – they looked amazing.


Perfect Lego themed party table sparkleshinylove


Perfect Lego themed party table sparkleshinylove


Perfect Lego themed party table sparkleshinylove


Perfect Lego themed party table sparkleshinylove


Some of the finishing touches on the table included large Lego blocks from Toys R Us, and also a gold “3” balloon to finish off the table.


Perfect Lego themed party table sparkleshinylove


I had a few other themed items around the house like this soap dispenser I made with Legos floating inside.


Perfect Lego themed party table sparkleshinylove


Catering lunch was easy with help of Panera Bread – they had customizable lunch boxes which included either a sandwich, pickle, a cookie and chips, or half a sandwich, salad, cookie and chips. They made passing out lunch really easy!


Perfect Lego themed party table sparkleshinylove


Perfect Lego themed party table sparkleshinylove


Perfect Lego themed party table sparkleshinylove


Overall I was really happy with the table, and my son had a great time at his party!


Mandy Furnis


DIY Painted Easter Wreath

DIY Painted Easter Wreath sparkleshinylove


I’m a big fan of wreaths. I pretty much have one for every occasion. It really annoys my husband because they are usually big and bulky, so they are difficult to hang on the door. But they are pretty, so I make him do it.

For Easter I decided to make my own wreath, which I had never done before! I bought a plain wreath at Michaels which was normally $6.99 but I had a 40% off coupon so it was a little over $4.00.

I picked up eggs at Dollarama for $2.00 a carton, and I already had a gold pen from my last DIY project. This whole project only cost me just over $10! Impressed? I was!


DIY painted Easter wreath sparkleshinylove


DIY painted Easter wreath sparkleshinylove


I either drew designs on each egg with the pen, or held it on the egg so enough would come out so I could use a brush to cover the egg.


DIY painted Easter wreath sparkleshinylove


DIY painted wreath sparkleshiny love


The easiest part was to glue gun the eggs onto the wreath. That’s it! This was a really easy project. Normally wreaths are expensive, so creating this one for $10.00 was pretty awesome!


DIY painted Easter wreath sparkleshinylove


DIY painted Easter wreath sparkleshinylove


Mandy Furnis


DIY Painted Globe

DIY hand-painted globe sparkleshinylove


I was walking through Chapters the other day and spotted the flashiest little globe. I really didn’t know I was in need of a globe until I came across this one. It had to be mine! I checked out the price and realized owning it would be a bit more complicated. Yes it was on sale from $149.50 to $119.50, but I could already hear my husband asking questions if I made the purchase.

“We needed a globe?” “Where is it going?” “How much was it?”


Hand-Painted Globe Chapters

Via


It’s the last question about how much it would have cost that I was a little worried about, so I set off to make my own painted globe.

I bought the globe, paint and brushes at the dollar store. I purchased a gold paint pen as well from Michael’s, but had no choice but to buy it in a three-pack with other colors. Overall this project only cost me $16.


Hand painted globe supplies


DIY hand-painted globe sparkleshinylove


I wasn’t sure if dollar store paint would work, but ended up turning out really well. I covered the globe in 3 coats of black paint to start. This was actually very easy since the globe was on a stand.


image


Next up I had to paint the continents. I did this free hand while looking at a map on my iPad, but I’m sure if you wanted to be more accurate you could trace the continents on the globe before painting.


Hand-painted globe sparkleshinylove


I used four coats of the white paint and let it dry before I used the gold paint pen to handwrite the oceans and continents on the globe. Again, having the globe on a stand was super helpful! It was easier than I thought it would be to do the handwriting, but there was definitely still some concentration involved.

Once it dried I was very happy with the overall project, and I was happy to inform my husband about how much money I saved him with this DIY project.

That way he would be more understanding when I end up spending the money I saved in other places. Like on shoes.


DIY hand-painted globe sparkleshinylove


DIY hand-painted globe sparkleshinylove


DIY hand-painted globe sparkleshinylove


Mandy Furnis