Trendy Winter Weather Hats

Mandy-furnis-sparkleshinylove


I love my new hat! I always wanted a chic winter hat. I felt like there was no practical purpose to me owing a hat like this, but once I actually tried one on I realized practicality didn’t matter. This hat demanded to be part of my winter wardrobe.

This one from H&M is made of wool and it actually keeps my ears really warm, which I didn’t even discover until I travelled outside wearing it. Wait, so now it’s sort of practical, right?

It’s not the kind of hat I would wear on a play date or for grocery shopping, but for lunch with the girls or a shopping trip? Absolutely! Here are a few more of my favourite stylish winter hats below.


Mandy-Furnis-Sparkleshinylove


Tory-burch-wide-brimmed-hat

Tory Burch Wide Brim Hat


Zara-canvas-wide-brimmed-hat

Zara canvas wide brimmed hat


Forever-21-wool-fedora

Forever 21 Wool Fedora


Asos-heart-band-felt-floppy-hat

Asos Heart Band Felt Floppy Hat


Aeo-wide-brim-fedora

AEO Wide Brim Fedora


daily sparkle

Don't be afraid of being different, be afraid of being the same as everyone else.

Via

Winner of the Disney Live! Mickey’s Music Festival Tickets

Disney Live! Mickeys Music Festival

The randomly selected winner of the Disney Live! Mickey’s Music Festival tickets is Jennifer Machin! Congratulations Jennifer – I’ll be contacting you shortly so you can claim your tickets.

Thank you to everyone who entered!

Tips For Creating Your New Year’s Resolutions

sparkleshinylove


I think New Year’s Resolutions are meant to be broken if the aren’t well thought out.

Most people seem to break their resolutions early into the year even if they have good intentions. Last year was my first year EVER where I could honestly say I fulfilled all of my resolutions. I took a few days to come up with three that were important to me that I would fulfill. These weren’t the kind of resolutions you share at a New Year’s Eve party before midnight – those are the kind I try to avoid. These ones were personal, and hard to share with others so they understood why I set them. I am by far no expert at setting resolutions, but here are some tips that were successful for me!

1. Set Specific Goals

Saying “I want to lose weight this year”, or “I want to go to the gym more this year”, are easy resolutions to break because they are not specific. How many times a week will you go to they gym? If you go once a month is that enough to fulfill the resolution? Is losing 5 lbs at one point in the year enough to say you were successful?

Using measurable goals will motivate you more to attain them! There is more of a chance you will fulfill a resolution where you specifically say something like “I will go to the gym 3 times per week for the year”, because if you go once or twice a week (or not at all) then you know you are not reaching your goal. Hopefully there will be some guilt associated with you not fulfilling you end of the deal.

2. Write Your Resolutions Down

Having a visual will remind you to keep up with your resolutions when you wander off track. I had a horrible job once that I just loathed, and someone suggested to me that I write down on a piece of paper “It’s just a job” and hang it somewhere in my office (don’t worry – I worked from home!) to remind me that there was so much more to life than what I was doing for work. This silly piece of paper had this crazy calming effect that would wash over me every time I read it. Speaking it is one thing, but the visual gave me something to focus on.

Writing my resolutions down really inspired me to fulfill what I had set out to do. I wrote them down in my day planner which I looked at every day, and on the days my mind was elsewhere I would inadvertently look at that page and get back on track.

3. Think About Keeping Your Resolutions To Yourself

Sometimes it’s a good idea to keep personal things to yourself. If you are positive this is a resolution you want people to know about, and you know you can achieve it then sharing shouldn’t be a problem. If you are worried you can’t fulfill your end of the deal, it may be a good idea not to Tweet your list of resolutions!

The things I work the hardest at to achieve just seem to be a personal struggle that I’m not ready to share until it flops or becomes a success. I’m a little superstitious when it comes to my personal goals. I feel like if I go ahead and say “I just had the most amazing interview and I’m sure I’m going to get the job!”, then I’ve jinxed myself and have no shot. I feel like the same goes for resolutions – over sharing what you think you will do can backfire. For some people being vocal could push them more to achieve. If that’s you than go for it! I am absolutely not one of those people.

4. Be Realistic. Seriously.

Don’t set yourself up for failure before the year even starts. This seems like a simple one, but in my previous resolutions that were less successful it seems like I picked things that were totally unattainable. Start small! Choose something that you have to work at to attain, but not so hard you are going to be bummed you didn’t make it.

5. Track Your Progress and Celebrate Your Successes

After I had my son I had a pretty specific goal to lose the exact amount of weight I had gained while pregnant. Along the way I used a great App called My Fitness Pal that tracked my progress during my journey. When I reached milestones I usually celebrated with a cheeseburger, but that was celebration enough for me!

Tracking your progress along the way can help you determine how you made it to that point, and what you did right to get there.

Good luck with your resolutions, and have a Happy new Year!

My At-Home Gel Manicure With SensatioNail Fuse Starter Kit

Fuse-Gelnamel


For a girl who tries to stay on top of the trends, I’m embarrassed to say my first time doing a gel manicure was for this blogpost. Crazy right? I’ve heard rave reviews about them, but I’ve never really looked into doing one myself.

I do my own nails a lot. Like one to two times a week! I’m constantly changing my polish because I’ve either chipped it, or I feel like a colour change.

The hard part about my at-home manicures has been the presence of my toddler. I am always waiting for his nap or bed time to do my nails so they have a chance to dry.

I was a little worried that a gel manicure would be too time consuming for me to take on with the limited time I have to spare.

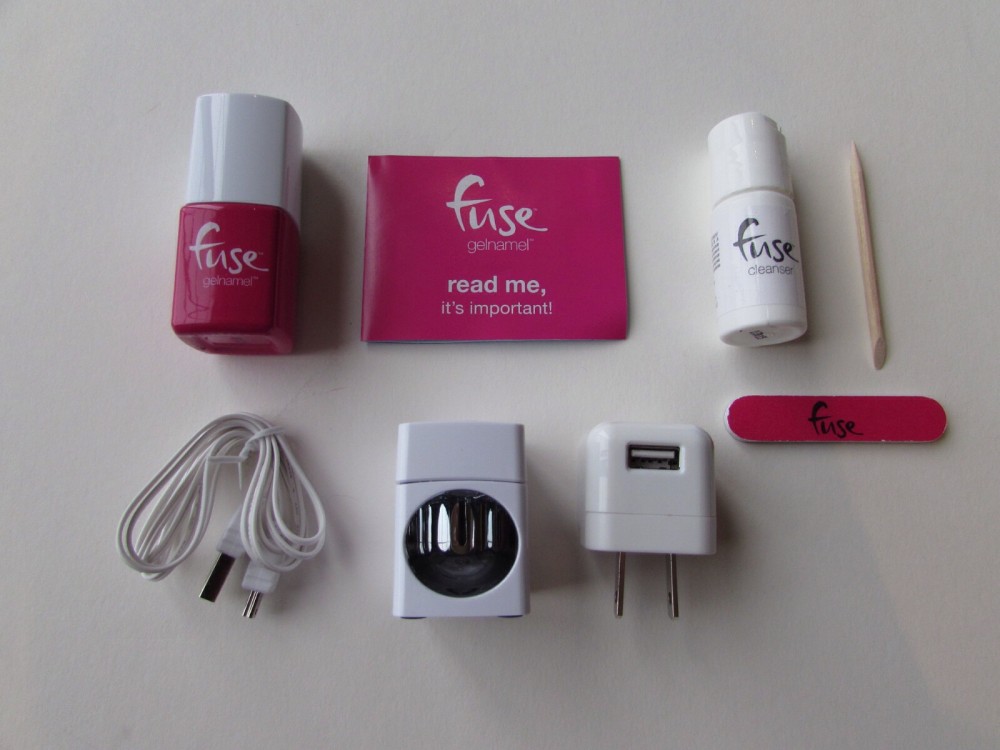
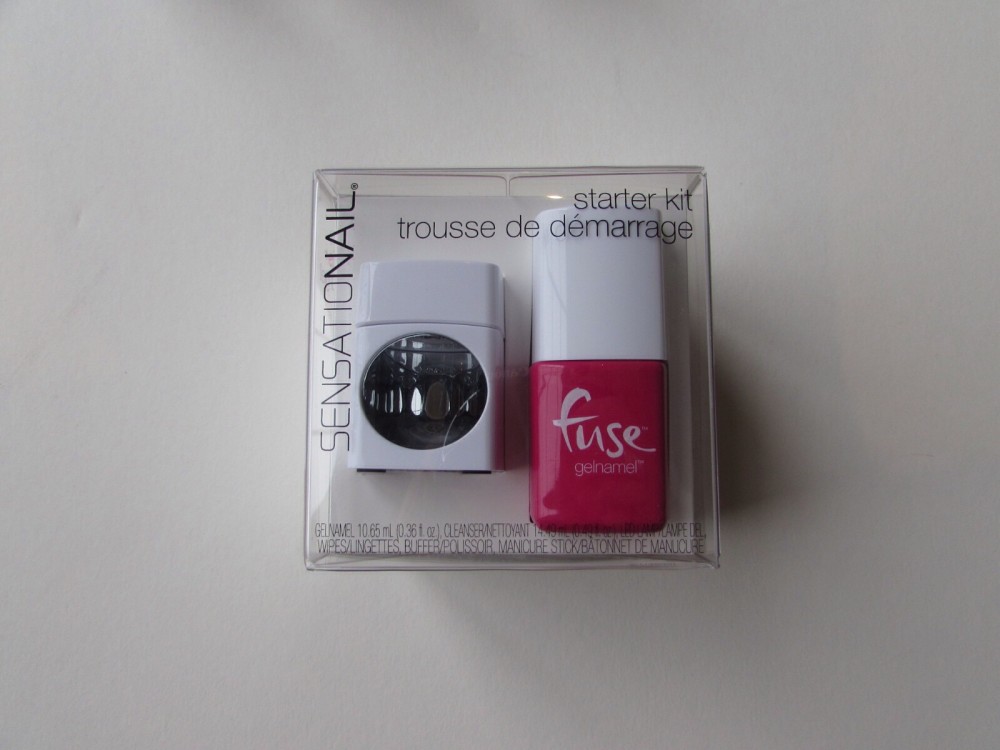
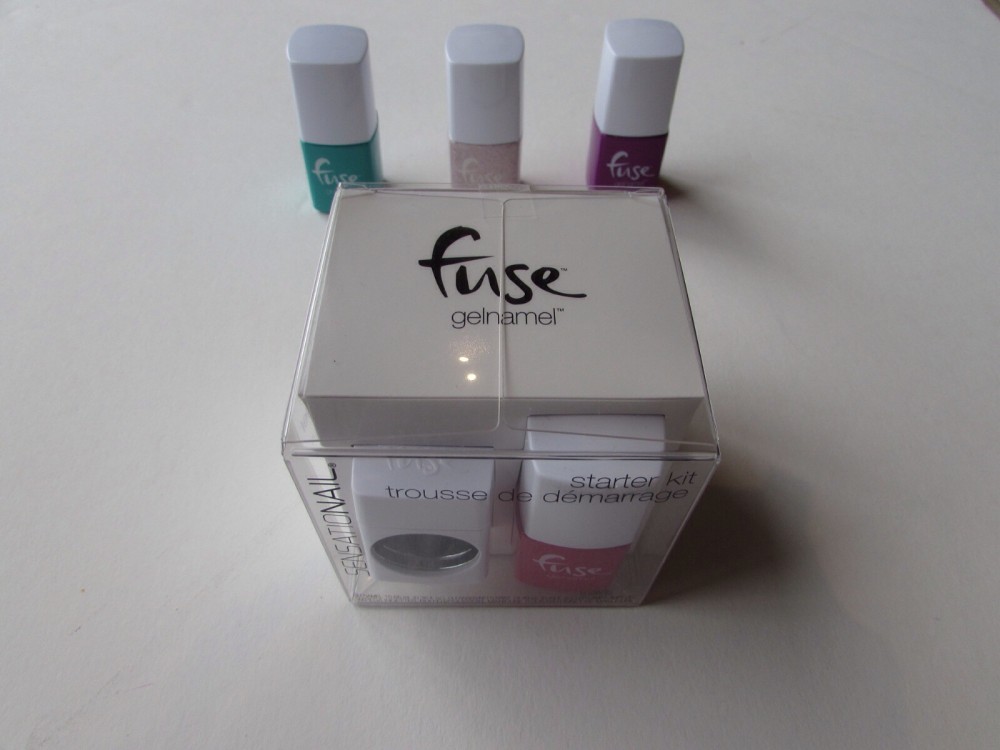
The SensatioNail Fuse Starter Kit is so pint-sized that it’s hard to believe what it includes. A Fuse Gelnamel colour, nail file, manicure stick, Gel Cleanser, cleansing cloths, and a high-powered Fuse LED lamp is included in the kit.


Fuse-Gelnamel


Fuse-Gelnamel


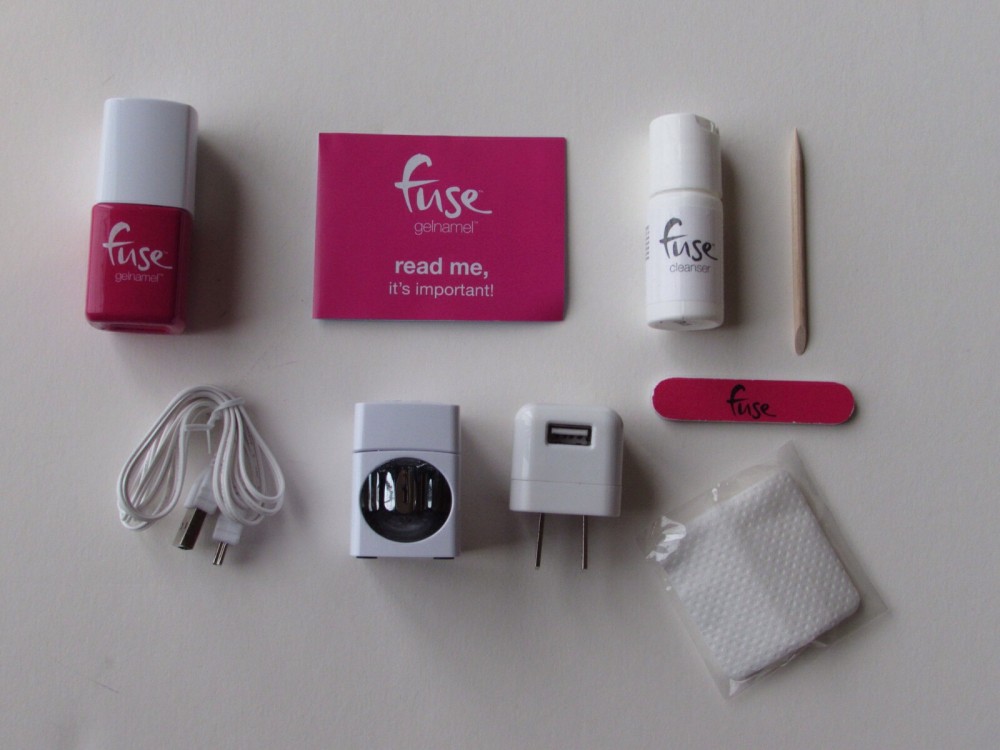
The Fuse Gelnamel polish formula ensures you don’t need a base or top coat which makes life even easier!

Since this was my first time doing a gel manicure, I read the instructions very carefully. I usually skip the whole “instructions” part of a project, but I figured I’d better play by the rules this time around. It was pretty easy because there weren’t many (part of the reason I was following them). Basically I had to wipe my nails with the cleanser, then add the polish. It was important to do very thin coats! The tiny LED lamp easily plugged in, and the button to turn the light on would stay on for 30 seconds, which is all you would need to set the polish on each nail.


Fuse-Gelnamel


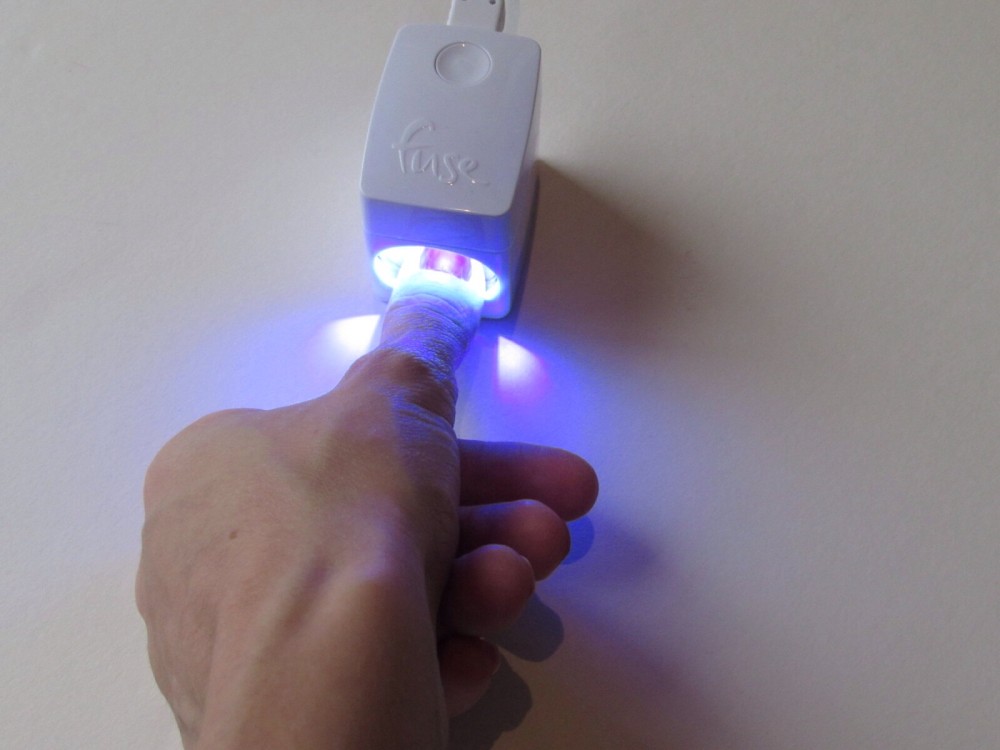
The final step was to cleanse the nail again, and that’s it. I was surprised how easy it was. Each nail had to be painted and set with the LED lamp one nail at a time, and that was actually a good thing for me because the first time I tried the kit my son woke up with a nightmare (of course) during his nap! Luckily I was able to run upstairs and soothe him without getting my new manicure all over him.

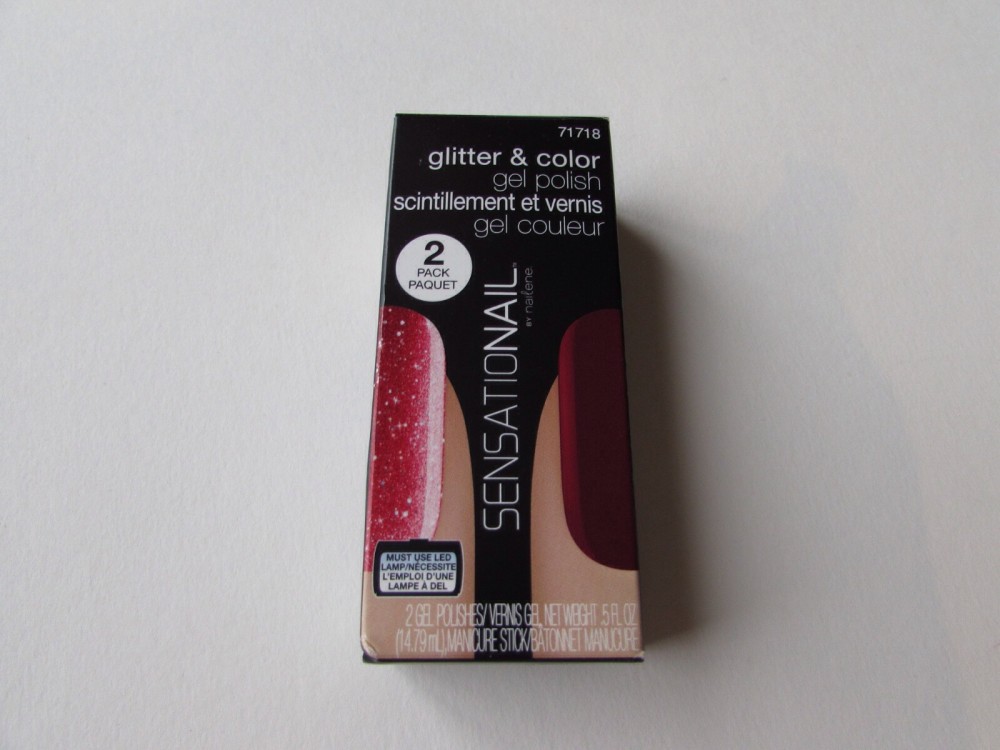
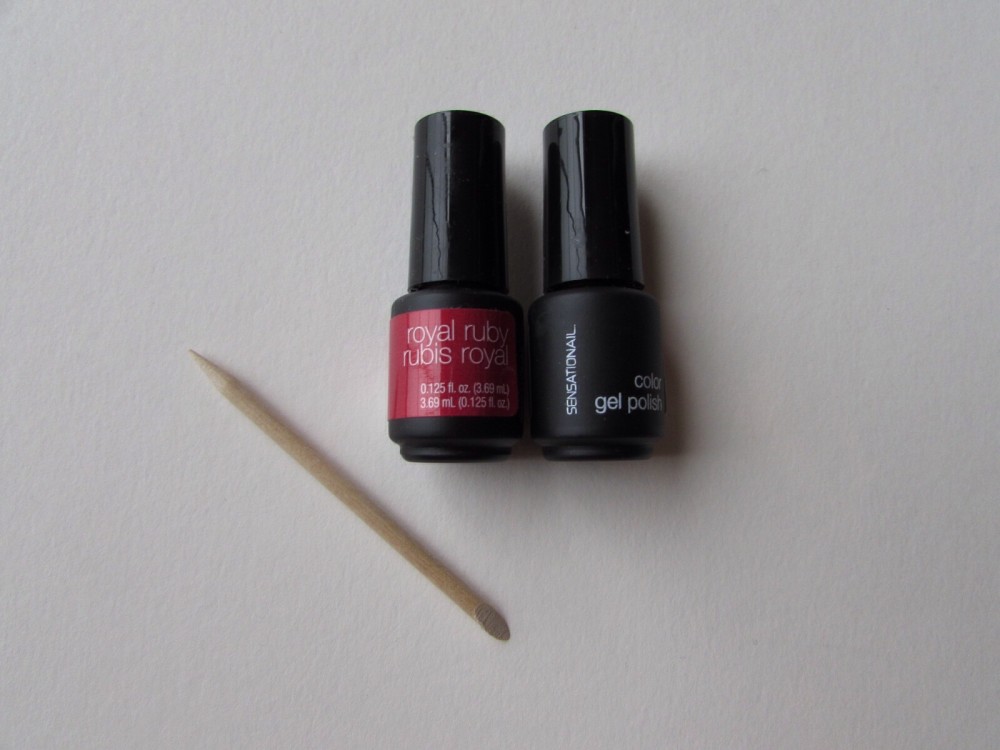
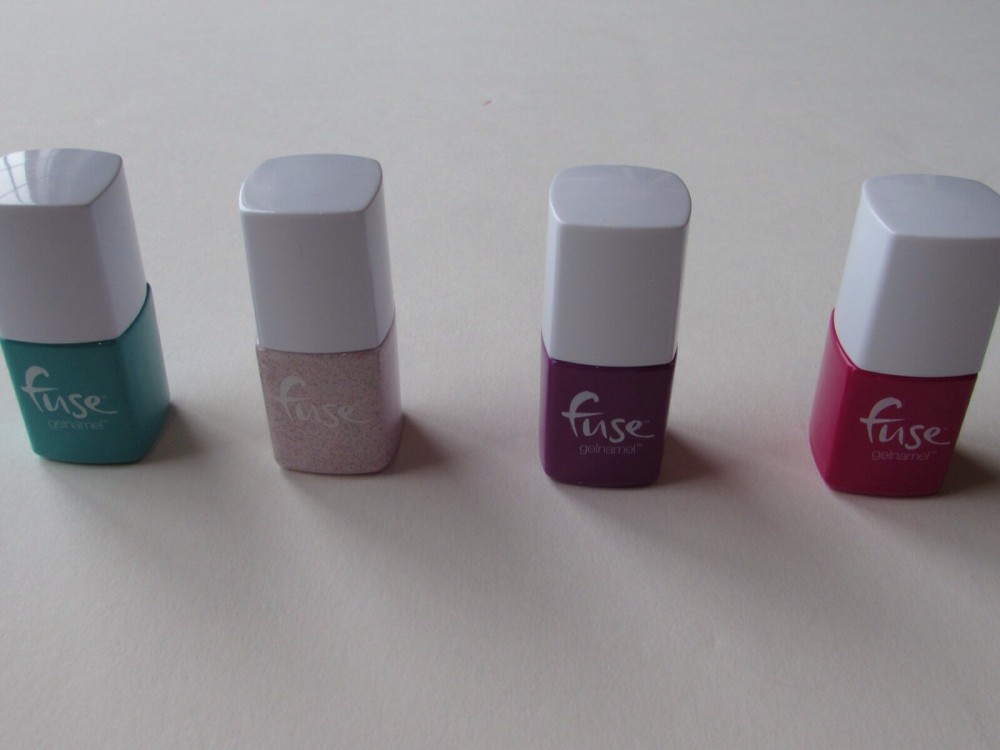
I decided to try one of the SensatioNail colour kits because it included a matching sparkle polish. Fuse also sells individual colours as well which you can use once you buy the starter kit.


Fuse-Gelnamel


Fuse-Gelnamel


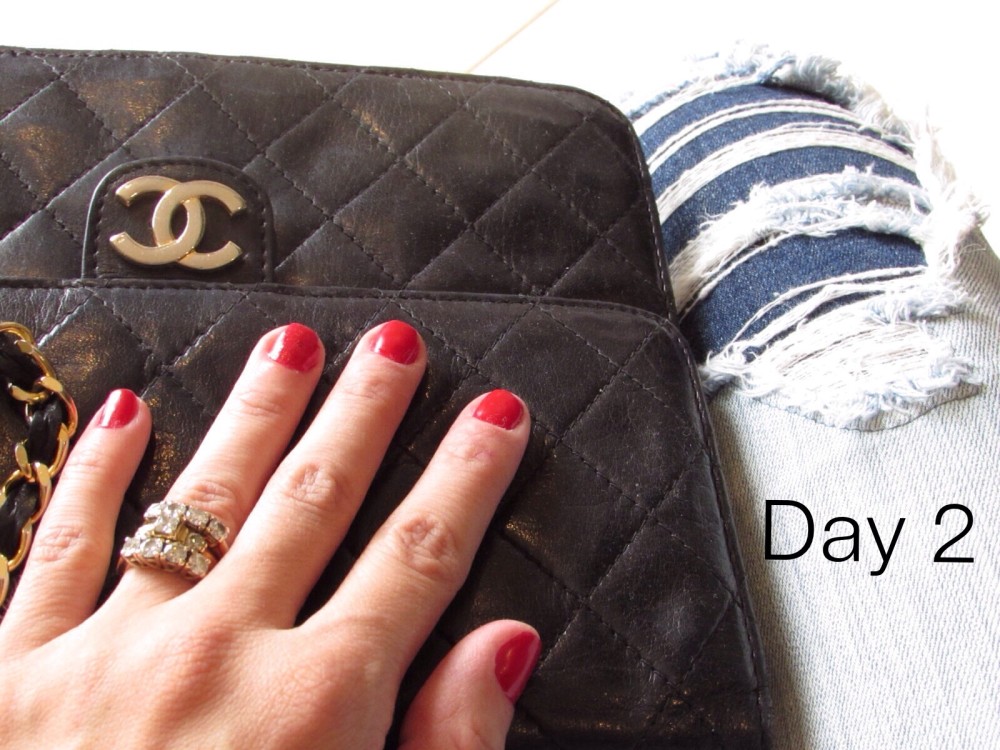
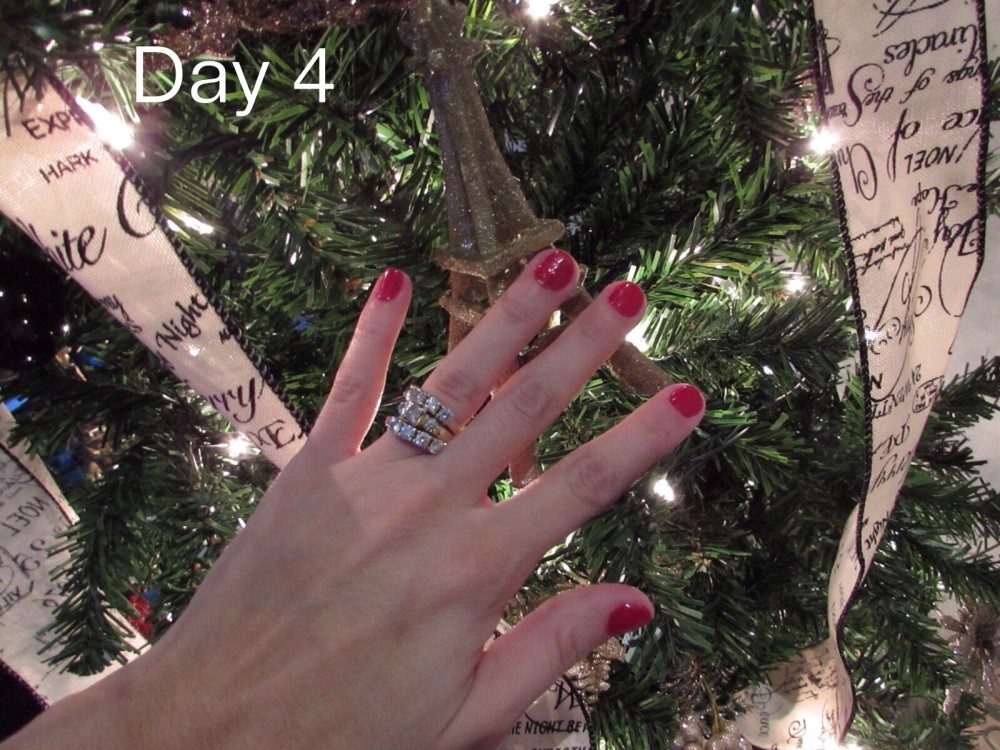
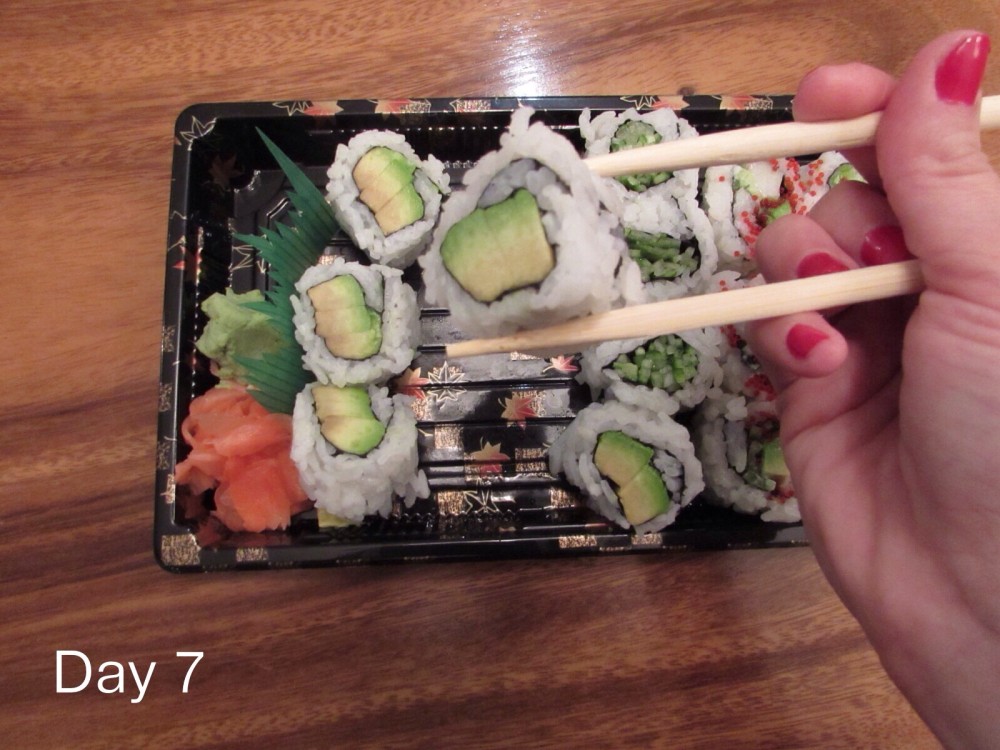
The real test for me would be how long this polish would last without chipping. My nails are the worst – they are always breaking, and I chip my polish all the time. I kept track of my progress to see how long the manicure would last over the holidays.


Eight days is a new record for me for sure. I’m used to making it three days without a chip if I’m lucky! On the 9th day I finally chipped a nail, and decided it was time to remove the polish.

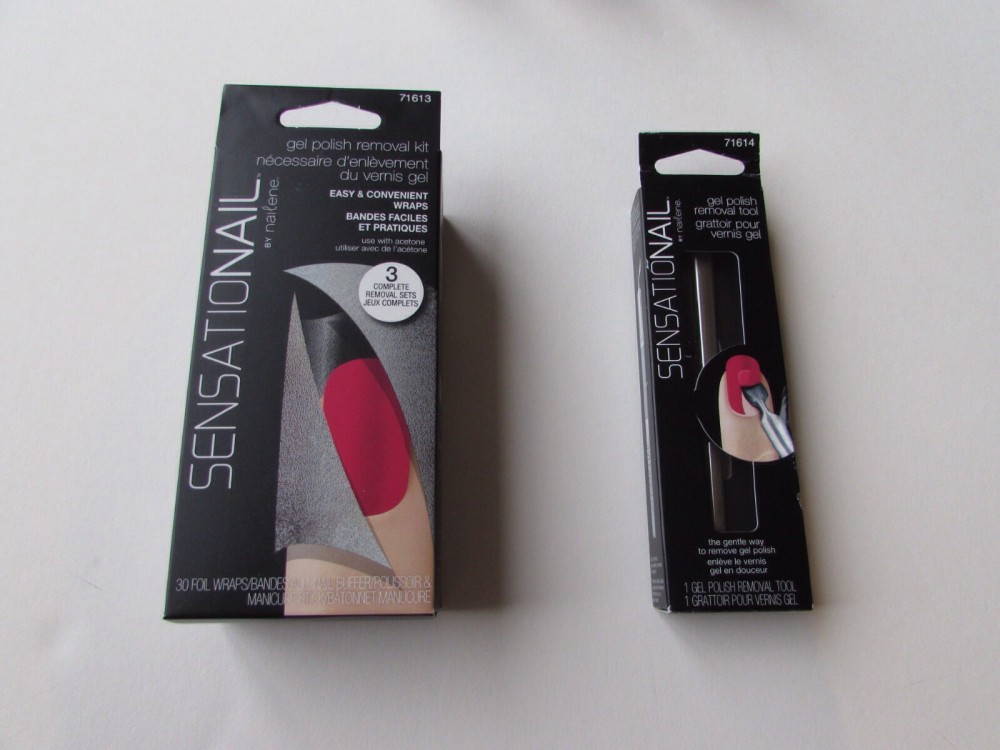
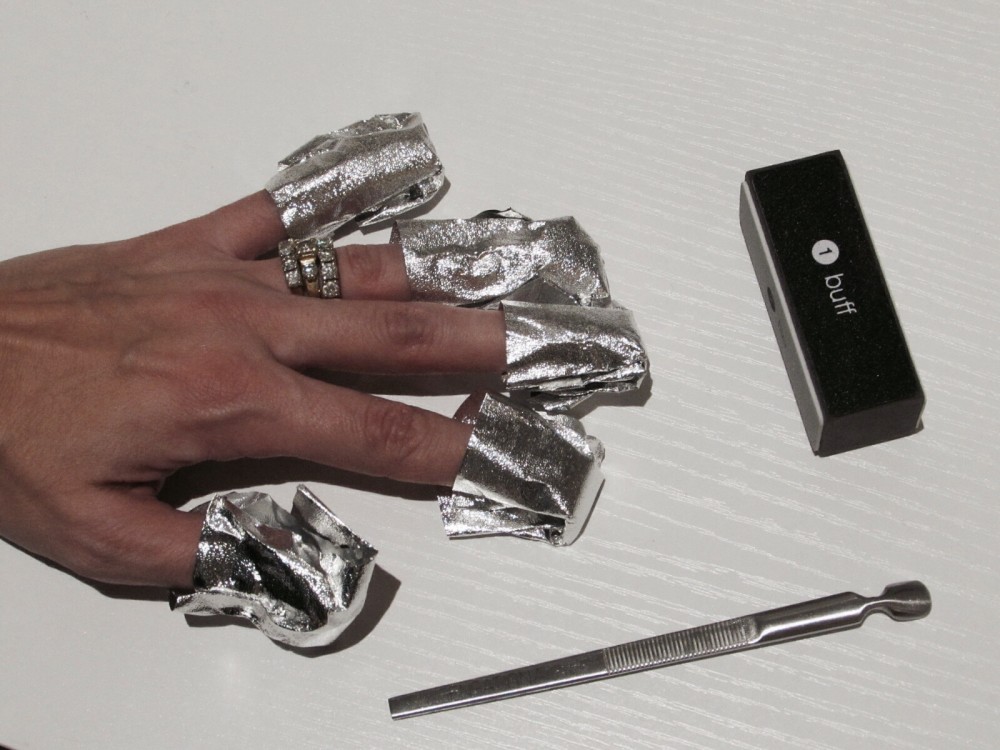
I used the SensatioNail Gel Polish Removal Kit and SensatioNail Gel Polish Removal Tool for this part. The foil had pads inside that I saturated with acetone, and left on for fifteen minutes. Once I removed the foil, most of the polish slid off as well. I used the removal tool to remove the rest of the polish easily.


Fuse-Gelnamel


image


The whole process ended up being a lot easier than I expected! It gave my nails a chance to grow as well since the gel manicure prevented my nails from breaking. The best part was how quick the process was. Thirty seconds for each nail to dry was very impressive, and was perfect for someone like me who doesn’t have a lot of time to work on their manicure.


Fuse-Gelnamel


Fuse-Gelnamel


I’m not sure why it took me so long to try a gel manicure, but now I get what everyone is raving about. This home kit couldn’t have made it easier for me!

You can find the SensatioNail Fuse Starter Kit, and other SensatioNail products at most major drug stores (including Shoppers Drug Mart), and online here.